
True Metrix Glucometer Manual: A Comprehensive Guide
This manual provides detailed instructions for using the TRUE METRIX blood glucose meter, covering setup, testing, data management, and troubleshooting.
It ensures accurate monitoring and wireless data delivery via smartphone connectivity, adhering to FDA clearance standards.
Always use TRUE METRIX test strips and control solution for optimal performance.
The TRUE METRIX glucometer is a user-friendly device designed for accurate blood glucose self-monitoring. This system empowers individuals to actively manage their diabetes with confidence.
It offers features like wireless data transfer to smartphones (TRUE METRIX AIR) and is FDA cleared for reliable performance.
This guide details proper usage, ensuring correct readings and effective diabetes management. Remember to always follow product instructions for optimal results and safety.
Understanding the Components
The TRUE METRIX system includes a meter, a lancing device, TRUE METRIX test strips, and sterile lancets. The meter displays glucose readings and manages data.
The lancing device facilitates blood sample collection. TRUE METRIX test strips are essential for accurate analysis, and lancets ensure a safe and controlled finger prick.
Control solution verifies meter and strip functionality. Only use designated TRUE METRIX components for reliable results.
Meter Overview & Features
The TRUE METRIX meter is designed for simplicity and accuracy in blood glucose monitoring. It features automatic on/off functionality when inserting a test strip.
The meter displays clear, easy-to-read glucose readings and stores past results for tracking trends.
Some models, like TRUE METRIX AIR, offer wireless data transfer to smartphones. It’s specifically assigned to one user, preventing cross-contamination and ensuring personalized data.
Included Accessories: Lancets, Test Strips, Control Solution
Your TRUE METRIX glucometer kit includes essential components for accurate testing. These are sterile lancets for blood sampling, TRUE METRIX blood glucose test strips – only use these – and TRUE METRIX control solution.
The control solution verifies meter and strip functionality.
Ensure compatibility; only use specified accessories to maintain accuracy and avoid invalid results. Proper disposal of lancets and strips is crucial for safety.
Setting Up Your True Metrix Glucometer
Before initial use, your TRUE METRIX meter requires basic setup. This involves configuring the date and time for accurate record-keeping. The meter often arrives with a pre-set time, but verification is recommended.
To begin testing, insert a TRUE METRIX test strip into the designated port; the meter will automatically power on.
Always refer to the product instructions for detailed guidance.
Initial Setup: Date and Time Configuration
Upon first use, verify the date and time displayed on your TRUE METRIX meter. Accurate time-stamping is crucial for correlating blood glucose readings with meals and activities.
Consult the owner’s manual for specific instructions on adjusting these settings, as the process may vary slightly depending on the model.
Correct configuration ensures reliable data tracking.
Inserting a Test Strip
To begin testing, gently insert a TRUE METRIX test strip into the designated port on the meter. The meter will automatically power on, displaying readiness indicators.
Ensure the strip is fully inserted and correctly oriented; improper insertion may lead to inaccurate results or error messages;
The meter is designed to only work with TRUE METRIX strips.
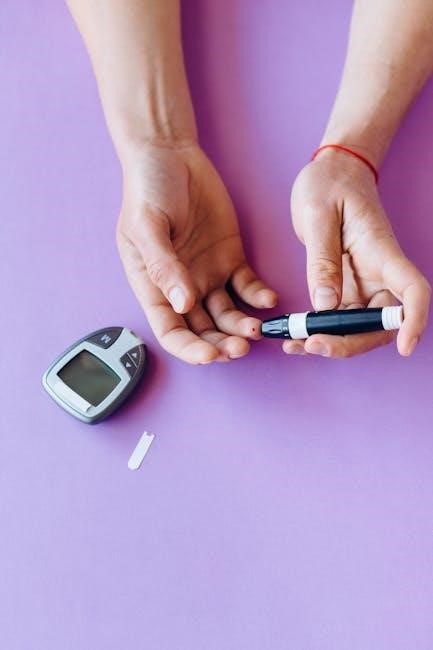
Performing a Blood Glucose Test
Performing a test involves several key steps. First, prepare the lancing device with a sterile lancet. Obtain a small blood sample by gently pricking your fingertip.
Carefully apply the blood droplet to the designated area on the TRUE METRIX test strip.
The meter will then display your blood glucose reading within seconds, providing vital health information.
Preparing the Lancing Device
To prepare the lancing device, first, remove the protective cap. Then, insert a new, sterile lancet firmly into the device, ensuring it clicks into place.

Adjust the depth setting according to your skin type and preference – a lower setting is suitable for thinner skin;
Finally, cock the device, readying it to obtain a blood sample for accurate glucose monitoring with your TRUE METRIX meter.
Obtaining a Blood Sample
Before testing, wash your hands thoroughly with soap and warm water, then dry completely. Select a fingertip site, preferably on the side, and gently massage to encourage blood flow.
Press the lancing device firmly against the chosen site and press the release button.
Wipe away the first drop of blood with a clean tissue, as it may contain tissue fluid, and prepare for applying the sample to the TRUE METRIX test strip.
Applying Blood to the Test Strip
Once a sufficient blood drop is present, gently touch the edge of the TRUE METRIX test strip to the blood.
Allow the strip to draw the blood in automatically – do not smear or apply excessive pressure.
The meter will begin counting down, displaying the test progress, and a result will appear within seconds. Ensure adequate lighting for accurate reading.
Understanding Your Results
The TRUE METRIX meter displays your glucose reading numerically, indicating your blood sugar level at the time of testing.
Interpreting these readings requires understanding target ranges, as defined by your healthcare provider.
High readings may indicate the need for dietary adjustments or medication, while low readings require immediate attention to prevent hypoglycemia.
Regular monitoring helps manage diabetes effectively.
Glucose Reading Display
The TRUE METRIX meter clearly presents your blood glucose result as a numerical value, typically in milligrams per deciliter (mg/dL).
The display also incorporates indicators for pre- and post-meal status, aiding in contextualizing the reading.
Additionally, the meter may show symbols for high or low results, providing immediate feedback.
Ensure adequate lighting for optimal visibility of the display.
Interpreting High and Low Readings
High glucose readings, consistently above your target range, may indicate insufficient medication or dietary adjustments are needed.
Low readings, below your target, could signal excessive medication, skipped meals, or increased physical activity.
Consult your healthcare provider to adjust your diabetes management plan based on these results.
Always address consistently high or low readings promptly to prevent complications.
Using the True Metrix Control Solution
Control solution verifies your meter and test strips are functioning correctly, ensuring accurate results.
Perform a control test when opening a new vial of test strips, if you suspect meter malfunction, or if results seem questionable.
Follow the instructions carefully, applying the control solution to the test strip as if it were a blood sample.
Compare the result to the range printed on the vial.
Why Use Control Solution?
Control solution confirms the TRUE METRIX meter and test strips work together as expected, providing confidence in your blood glucose readings.
It checks for potential issues like damaged strips or improper meter function.
Using control solution isn’t a substitute for regular calibration, but it’s a vital step to ensure accuracy, especially when opening new test strip vials or suspecting a problem.

Performing a Control Solution Test

To perform a control solution test, insert a TRUE METRIX test strip into the meter. Apply one drop of control solution to the test strip, ensuring complete coverage.
The meter will display a result; compare this to the range printed on the vial.
If the result falls within the specified range, your system is functioning correctly. Repeat if the result is outside the range.
Data Management & Memory Functions
The TRUE METRIX meter stores past test results, allowing you to review your glucose history. Access these records through the meter’s memory function to track trends.
The device automatically calculates averages, providing a clear overview of your glucose control.
Utilize these features to gain insights into your health and manage your diabetes effectively.
Reviewing Past Test Results
To review past results, navigate through the meter’s memory using the designated buttons. The TRUE METRIX meter stores a history of your glucose readings, allowing for trend analysis.
You can scroll through previous tests to identify patterns and understand how your lifestyle choices impact your blood sugar levels.
Regularly reviewing these results aids in effective diabetes management.
Average Calculation
The TRUE METRIX glucometer automatically calculates your average blood glucose levels over specified periods, typically 7, 14, or 30 days.
This feature provides a valuable overview of your long-term glucose control.
Access the average reading through the meter’s menu, allowing you and your healthcare provider to assess treatment effectiveness and make informed adjustments to your diabetes management plan.
Troubleshooting Common Issues
Troubleshooting addresses frequent problems with the TRUE METRIX meter. Common issues include error messages – consult the manual for specific meanings – and the meter failing to power on.
Ensure proper battery installation and test strip compatibility.
If problems persist, refer to the complete instructions for use or contact Nipro Diagnostics support for assistance, ensuring accurate and reliable glucose monitoring.
Error Messages and Their Meanings
Error messages on the TRUE METRIX meter indicate specific issues. The manual details each code, helping users diagnose problems.
Common errors relate to test strip insertion, insufficient blood sample, or strip/meter incompatibility.
Understanding these messages, as outlined in the product instructions, is crucial for accurate readings and effective troubleshooting, ensuring reliable glucose monitoring.
Meter Not Turning On
If your TRUE METRIX meter fails to power on, first ensure batteries are correctly installed and have sufficient charge.
Attempt replacing them with fresh batteries. Verify a test strip is properly inserted, as this automatically activates some models.
If the issue persists, consult the manual’s troubleshooting section for further guidance, as it may indicate a more significant technical problem requiring support.

Maintaining Your True Metrix Glucometer
Regular maintenance ensures accurate readings. Gently clean the meter with a damp cloth; avoid harsh chemicals.
Proper test strip storage is crucial – keep them in a cool, dry place, tightly sealed, and away from direct sunlight.

Do not use expired strips. Always refer to the product instructions for detailed cleaning and storage guidelines to prolong your meter’s lifespan and reliability.
Cleaning the Meter
To clean your TRUE METRIX meter, gently wipe the exterior with a slightly damp cloth.
Avoid using harsh chemicals, abrasive cleaners, or excessive moisture, as these can damage the device.
Ensure the meter is completely dry before inserting a test strip. Regular cleaning maintains hygiene and ensures accurate results. Refer to the product instructions for detailed guidance on proper cleaning procedures.
Test Strip Storage
Proper test strip storage is crucial for accurate readings. Store TRUE METRIX test strips in their original vial, tightly closed, in a cool, dry place.
Avoid direct sunlight, heat, and humidity.
Do not transfer strips to another container. Check the expiration date before each use; expired strips may yield inaccurate results. Following these guidelines ensures optimal performance and reliable blood glucose monitoring.
Safety Precautions
Always practice safe handling of the TRUE METRIX system. Never share your meter with others to prevent potential infection. Dispose of used lancets and test strips properly in a sharps container, following local regulations;
Avoid touching the blood sample area of the test strip.
If you experience any adverse reactions, discontinue use and consult a healthcare professional. Prioritize hygiene and responsible disposal for safe monitoring.
Proper Disposal of Lancets and Test Strips
Used lancets are considered sharps and require careful disposal. Always place them immediately into an FDA-cleared sharps container. Do not recap, bend, or break used lancets. Discarded test strips, while not sharps, should also be disposed of responsibly, following local guidelines.
Never throw loose lancets into the trash.
Proper disposal prevents accidental injuries and protects the environment.
Avoiding Infection
To prevent infection, do not share your TRUE METRIX glucose meter with anyone. Always wash your hands thoroughly with soap and water before testing. Clean the lancing device with alcohol before each use.
Use a fresh, sterile lancet for every test.
Proper hygiene minimizes the risk of transmitting bloodborne pathogens and ensures accurate results.
True Metrix Air Connectivity (If Applicable)
The TRUE METRIX AIR system enables wireless data transfer to your smartphone via Bluetooth. First, pair the meter with your device using the TRUE METRIX app.
Once connected, test results automatically upload, allowing for convenient tracking and analysis.
The app provides features like data visualization and reporting, aiding in effective diabetes management, as cleared by the FDA.
Pairing with Smartphone
To pair your TRUE METRIX AIR meter, download and install the TRUE METRIX app on your smartphone. Ensure Bluetooth is enabled on your device.
Open the app and follow the on-screen prompts to initiate the pairing process. The app will search for available meters.
Select your meter when it appears, and confirm the pairing request on both the app and the meter itself for a successful connection.
Data Transfer and App Features
Once paired, the TRUE METRIX app automatically transfers blood glucose readings from your meter wirelessly.
The app displays your results in an easy-to-understand format, offering graphs and trend analysis.
Features include logging insulin dosages, carbohydrates consumed, and activity levels.
You can also share data with healthcare professionals and set personalized reminders for testing and medication.

True Metrix PRO Specific Features
The TRUE METRIX PRO offers enhanced features compared to standard models, including a larger memory capacity for storing test results.
It utilizes TRUE METRIX PRO blood glucose test strips, designed for improved accuracy and precision.
This model provides advanced data analysis capabilities within the companion app, offering more detailed insights into glucose patterns.
Always refer to the product instructions for use to fully understand the PRO model’s capabilities.
Differences between Models

TRUE METRIX glucometers come in various models, with the PRO version offering expanded memory and advanced data features.
Standard models provide essential glucose monitoring, while the AIR model facilitates wireless data transfer to smartphones;
Key distinctions lie in connectivity, data storage capacity, and app integration.
Ensure compatibility between the meter and designated test strips – only use TRUE METRIX strips with your TRUE METRIX meter.
Understanding TRUE and TURE
TRUE, as an adjective, signifies accuracy and correctness, while TURE is a misspelling. When using TRUE METRIX products, always verify correct spelling on packaging and within the meter’s interface.
The TRUE designation guarantees compatibility with designated test strips and control solutions.
Incorrect spelling could lead to errors or improper functionality.
Always prioritize using correctly labeled TRUE METRIX components for reliable blood glucose monitoring.
Excel Function TRUE
While seemingly unrelated, the Excel function TRUE represents a logical truth value, returning 1. This concept mirrors the accurate readings desired from your TRUE METRIX glucometer.
Just as TRUE confirms a condition, the meter aims to deliver a TRUE reflection of your blood glucose level.
Understanding this logical principle reinforces the importance of accurate data and reliable results from your monitoring system.
Minecraft Night Vision Command
The Minecraft command for permanent night vision – /effect a night_vision 99999999 255 TRUE – highlights the desire for continuous clarity.
Similarly, the TRUE METRIX glucometer provides ongoing insight into your glucose levels, offering a “clear view” of your health.
Regular monitoring, like sustained night vision, empowers informed decisions and proactive management of your well-being.
FDA Clearance and Wireless Data Delivery
The TRUE METRIX glucose meter has received FDA clearance, ensuring its safety and accuracy for blood glucose testing.

A key feature is its ability to wirelessly deliver data to a smartphone, simplifying tracking and sharing with healthcare professionals.
This seamless connectivity, facilitated by TRUE METRIX AIR, promotes proactive diabetes management and informed healthcare decisions.

Product Instructions for Use
Before using the TRUE METRIX system, carefully read all provided instructions.
Ensure you only use TRUE METRIX PRO blood glucose test strips and control solution with your meter.
The meter arrives with a pre-set date and time, but this can be adjusted;
Proper lancing device preparation and correct blood application are crucial for accurate results.
Do not share your meter with others to maintain personalized data.