
Embark on a delightful crafting journey! Discover the joy of creating personalized, practical zipper pouches through easy tutorials․ Learn to sew pouches for makeup, pens, or travel essentials, utilizing readily available materials and simple techniques․
Explore beginner-friendly methods, even without specialized tools, and unleash your creativity with aesthetic bag patterns․ Join the growing community of DIY enthusiasts crafting stylish and functional pouches!
Why Make Your Own Zipper Pouches?
Crafting your own zipper pouches offers a unique blend of practicality and personalization․ Instead of relying on mass-produced items, you gain complete control over fabric choices, sizes, and aesthetic details․ Imagine a makeup bag perfectly tailored to your collection, or a pencil case reflecting your individual style – the possibilities are endless!
Beyond the creative satisfaction, making your own pouches is often more economical․ Utilizing fabric scraps and readily available zippers reduces waste and saves money․ Furthermore, it’s a fantastic skill to learn, opening doors to more complex sewing projects․ The tutorials available online, like those shared on platforms showcasing easy DIY crafts, empower beginners to confidently tackle this rewarding project․

Consider the environmental benefits too! Repurposing materials, such as polyethylene shopping bags into waterproof pouches, contributes to sustainability․ Ultimately, a handmade zipper pouch isn’t just an accessory; it’s a testament to your creativity, resourcefulness, and personal style․
Brief History of the Zipper and its Application in Pouches
The story of the zipper begins surprisingly early, with various “clasp lockers” patented throughout the 19th century․ However, it was Whitcomb Judson’s “Clasp Locker” in 1893 that’s considered a precursor to the modern zipper, though initially cumbersome․ Gideon Sundback significantly improved the design in 1913, creating the “Hookless Fastener” – a more reliable and practical closure․
Initially adopted for boots and tobacco pouches, the zipper’s application expanded slowly․ Its use in clothing gained traction in the 1930s, becoming increasingly popular for children’s wear and, eventually, mainstream fashion․ The convenience and secure closure offered by zippers quickly made them indispensable․
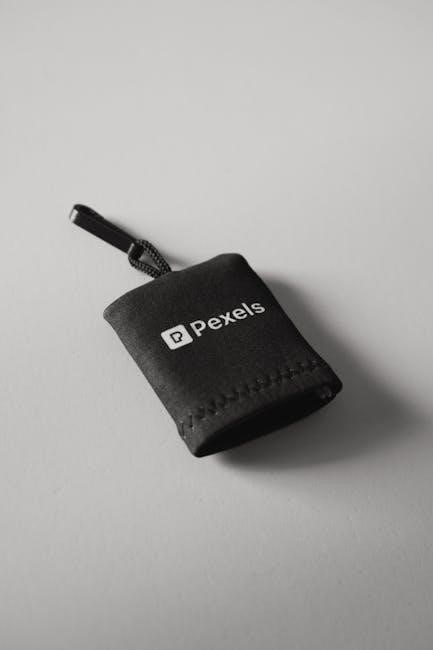
Pouches, traditionally secured with buttons or drawstrings, readily embraced the zipper’s functionality; From simple coin purses to cosmetic bags and travel organizers, the zipper provided a secure and streamlined closure․ Today, the zipper remains a cornerstone of pouch design, offering both practicality and a touch of modern convenience, as demonstrated in countless DIY tutorials․

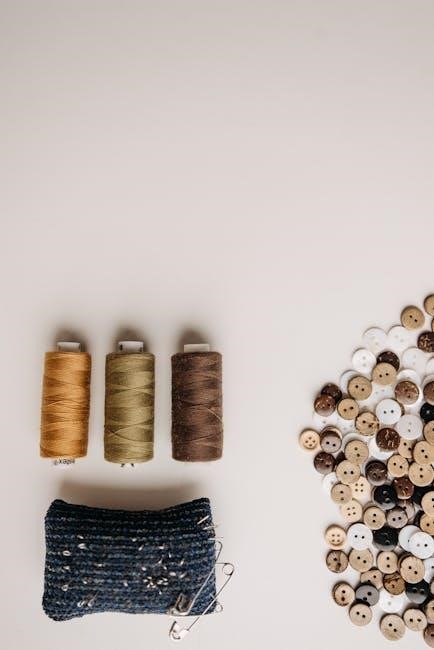
Materials Needed for a Basic Zipper Pouch
Gather fabric – cotton, canvas, or waterproof options – a suitable zipper, scissors, pins, and a seam ripper․ A sewing machine is highly recommended for efficient construction!
Fabric Choices: Cotton, Canvas, and Waterproof Options
Selecting the right fabric is crucial for your zipper pouch project, influencing both its appearance and functionality․ Cotton fabrics are excellent for beginners due to their ease of handling and wide variety of prints and colors, making them ideal for cosmetic pouches or pencil cases․
Canvas, a heavier-weight fabric, provides increased durability and structure, perfect for pouches intended to withstand more wear and tear, like travel pouches․ For projects requiring water resistance, consider utilizing waterproof fabrics․ These are particularly useful for storing toiletries or items that might be exposed to moisture․
Interestingly, resourceful crafters are even repurposing polyethylene shopping bags to create surprisingly sturdy and waterproof zipper pouches, contributing to eco-friendly practices! The choice ultimately depends on the intended use of the pouch and your desired aesthetic․ Don’t be afraid to experiment with different fabric combinations to achieve unique results!
Remember to pre-wash your fabric to prevent shrinkage after the pouch is completed․
Zipper Selection: Sizes, Types (Metal, Plastic), and Colors
Choosing the appropriate zipper is vital for a professional-looking and functional zipper pouch․ Zippers come in various sizes, directly impacting the pouch’s overall dimensions and ease of use․ Consider the intended contents when selecting a size – smaller pouches benefit from shorter zippers, while larger pouches require longer ones․
You’ll encounter two primary zipper types: metal and plastic․ Metal zippers offer superior durability and a classic aesthetic, often preferred for heavier-duty pouches․ Plastic zippers are lightweight, cost-effective, and available in a vast array of colors, making them ideal for colorful or delicate projects․
Color selection is where you can truly personalize your pouch! Coordinate the zipper color with your fabric for a cohesive look, or opt for a contrasting color to create a bold statement․ Don’t overlook the zipper pull – it can be easily replaced to further customize your creation․ A well-chosen zipper elevates the entire project!
Essential Tools: Sewing Machine, Scissors, Pins, Seam Ripper
Embarking on a zipper pouch project requires a few key tools to ensure a smooth and successful crafting experience․ A sewing machine is highly recommended for efficient and precise stitching, though hand-sewing is possible for smaller projects․ Ensure your machine is threaded correctly and has a suitable needle for your chosen fabric․
Sharp fabric scissors are indispensable for accurately cutting fabric pieces․ Rotary cutters and mats offer an alternative for precise cuts, especially for larger quantities․ Pins are crucial for holding fabric layers together before sewing, preventing shifting and ensuring accurate alignment․ Invest in quality pins that won’t easily bend or break․
Finally, a seam ripper is your best friend for correcting mistakes! Don’t be discouraged by errors; a seam ripper allows for easy removal of unwanted stitches․ These four tools – sewing machine, scissors, pins, and seam ripper – form the foundation of your zipper pouch making toolkit․
Step-by-Step Zipper Pouch Tutorial: Simple Rectangular Pouch
Follow this guide to construct a basic rectangular pouch! Begin by cutting fabric for the outer layer and lining․ Then, carefully attach the zipper to both sections, joining them to complete your pouch․
Cutting the Fabric Pieces: Outer Fabric, Lining Fabric, and Measurements
Precise fabric cutting is crucial for a successful zipper pouch․ For a finished size of approximately 14․5cm x 20cm x 8cm (as one tutorial suggests), you’ll need to cut your outer fabric to 37cm x 30cm․ Ensure you’re using a rotary cutter or sharp scissors for clean edges․
Similarly, cut the lining fabric to the same dimensions: 37cm x 30cm․ Consider adding a ¼ inch seam allowance to all sides for a neat finish․ For smaller pouches, like a 5․7-inch wide version, adjust the measurements accordingly, remembering to account for the zipper length and seam allowances․
It’s helpful to mark the fabric with a fabric pen or chalk before cutting․ Double-check your measurements before proceeding, as accuracy impacts the final product․ Remember to cut two pieces each for the outer fabric and lining fabric, ensuring they are mirror images of each other․ These precise cuts will lay the foundation for a beautifully constructed zipper pouch!
Attaching the Zipper to the Outer Fabric
Begin by placing the zipper face down along the right side of the outer fabric piece․ Ensure the zipper tape extends slightly beyond the fabric edge – this allows for easier sewing․ Pin the zipper securely in place, maintaining a consistent distance from the edge, typically ¼ inch․
Using a zipper foot on your sewing machine is highly recommended for precision․ Sew along both sides of the zipper tape, close to the zipper teeth․ Backstitch at the beginning and end of each seam to secure the stitching․ Repeat this process for the second outer fabric piece, attaching the other side of the zipper․
Press the fabric away from the zipper, creating a clean and professional finish․ Carefully inspect the stitching to ensure the zipper is securely attached․ A properly attached zipper is fundamental to the pouch’s functionality and overall appearance, so take your time and prioritize accuracy!
Attaching the Zipper to the Lining Fabric
Now, repeat the process used for the outer fabric, but this time with the lining fabric pieces․ Place the zipper face down along the right side of the lining fabric, again ensuring the zipper tape extends slightly beyond the edge․ Pin securely, maintaining a consistent ¼ inch distance․
Utilize your zipper foot and sew along both sides of the zipper tape, close to the teeth․ Remember to backstitch at the beginning and end of each seam for reinforcement․ Consistent stitching is key for a durable lining․ Repeat for the second lining fabric piece, attaching the opposite side of the zipper․
Press the lining fabric away from the zipper, mirroring the finish on the outer fabric․ Double-check the stitching to confirm a secure attachment․ A well-attached zipper to the lining is crucial for a neat interior and the pouch’s structural integrity;
Joining the Outer and Lining Fabrics
With the zipper attached to both the outer and lining fabrics, it’s time to bring everything together․ Place the outer fabric and lining fabric right sides facing each other, aligning all edges carefully․ Ensure the zipper is partially open to allow for turning the pouch right-side out later․
Pin around all four sides, leaving a 3-5 inch opening along the bottom of the lining for turning․ Using a ¼ inch seam allowance, stitch around all sides, starting from one side of the outer fabric, continuing around, and ending on the other side․ Remember to backstitch at the beginning and end of your stitching․
Trim the corners to reduce bulk, being careful not to cut into the stitching․ Turn the pouch right-side out through the opening in the lining․ Press the edges neatly, and finally, hand-stitch the opening in the lining closed for a professional finish․

Advanced Techniques & Variations
Elevate your pouch-making skills! Explore adding handles, wrist straps, or structured interfacing․ Discover boxed corners for extra space and waterproof fabrics for specialized uses, enhancing functionality․
Adding a Handle or Wrist Strap
Transform your completed zipper pouch from simply practical to effortlessly portable by incorporating a handle or wrist strap! This seemingly small addition significantly enhances the pouch’s usability, making it ideal for on-the-go organization․ Several methods exist, catering to varying skill levels and desired aesthetics․
For a simple fabric handle, cut a strip of your outer fabric (or a coordinating one) to the desired length and width․ Fold it in half lengthwise, right sides together, and sew along the long edge, leaving the ends open․ Turn it right side out, press, and topstitch for a polished finish․ Attach the handle securely to the pouch body by stitching it firmly to the top seam, ensuring it can withstand weight․
Wrist straps offer a more streamlined carrying option․ Utilize pre-made webbing or create a fabric strap similar to the handle, but narrower․ Consider adding a swivel clasp for easy attachment and detachment․ Reinforce the attachment points with multiple rows of stitching or rivets for durability․ Experiment with different strap lengths to find what feels most comfortable for you!
Remember to consider the weight of the items you intend to carry when choosing the handle or strap material and attachment method․ A sturdy handle is crucial for heavier contents․
Incorporating Interfacing for Structure
Elevate your zipper pouch from floppy to fabulous by strategically incorporating interfacing! This often-overlooked step dramatically enhances the pouch’s structure, providing a more professional finish and improved durability․ Interfacing adds body to the fabric, preventing sagging and maintaining a crisp shape, even when the pouch is empty or lightly filled․
Several types of interfacing are available, each offering varying levels of stiffness․ Woven interfacing is ideal for medium-weight fabrics, providing a stable yet slightly flexible structure․ Fusible fleece adds a soft, padded structure, perfect for protecting delicate items․ Heavyweight fusible interfacing is best for thicker fabrics or when a very rigid pouch is desired․
To apply fusible interfacing, simply cut a piece slightly larger than the fabric piece you wish to reinforce․ Place the adhesive side of the interfacing onto the wrong side of the fabric and press firmly with a hot iron, following the manufacturer’s instructions․ Ensure a secure bond by applying even pressure and avoiding steam․
Consider interfacing the outer fabric, lining fabric, or both, depending on the desired level of structure․ Experiment with different weights to achieve your preferred result!
Boxed Corners for Increased Capacity
Transform your simple rectangular zipper pouch into a more spacious and versatile accessory by adding boxed corners! This clever technique creates a flat bottom, significantly increasing the pouch’s capacity without altering its overall dimensions․ Boxed corners are particularly useful for pouches intended to hold larger items or a greater volume of smaller objects․
The process involves carefully folding and stitching the bottom corners of the pouch to create a square base․ Begin by flattening each corner, forming a triangle with the side and bottom seams aligned․ Measure and mark a line across the triangle, determining the desired width of the boxed corner – typically between 1 and 2 inches․
Stitch along the marked line, reinforcing the seam for durability․ Trim away the excess fabric, leaving a ¼-inch seam allowance․ Repeat on the opposite corner․ The result is a pouch with a defined, flat bottom, offering enhanced stability and storage space․
Experiment with different corner widths to customize the pouch’s capacity and aesthetic․ Boxed corners are a simple yet impactful addition to any zipper pouch project!
Using Waterproof Fabric for Specific Applications (Cosmetics, Travel)
Elevate your zipper pouch projects with the practical benefits of waterproof fabric! Ideal for specific applications like cosmetics storage or travel essentials, waterproof materials provide crucial protection against leaks, spills, and moisture damage․ Consider using polyurethane laminated polyester (PUL) or coated nylon for optimal water resistance․
When working with waterproof fabrics, select a zipper designed for water resistance, such as a TPU (thermoplastic polyurethane) zipper․ Standard metal zippers can allow water penetration․ Ensure all seams are thoroughly sealed to prevent leaks; consider using a seam sealant specifically designed for waterproof fabrics․
For cosmetic pouches, waterproof linings safeguard makeup from accidental spills, while travel pouches protect electronics or toiletries during journeys․ Repurposing polyethylene shopping bags into waterproof pouches is an eco-friendly option, offering durability and reducing landfill waste․
Remember to use appropriate needles and thread for the chosen fabric․ Waterproof fabrics open up a world of possibilities for creating functional and reliable zipper pouches tailored to specific needs!
Zipper Pouch Design Ideas & Inspiration
Explore diverse pouch sizes – makeup bags, pencil cases, travel pouches – and aesthetic patterns! Discover free sewing patterns for stylish creations, perfect for all skill levels and personalized gifts․
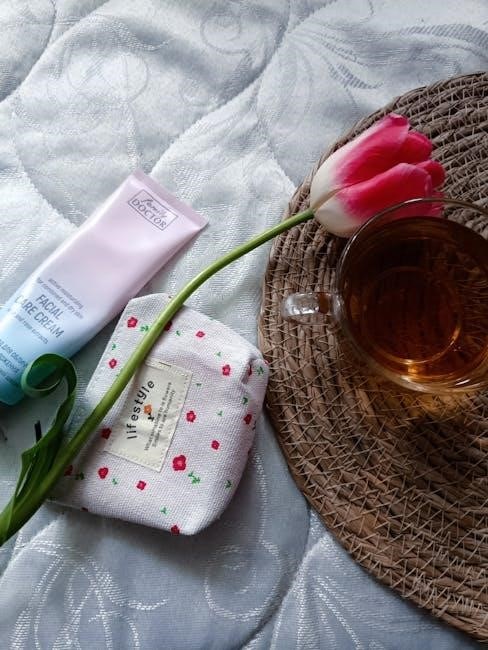
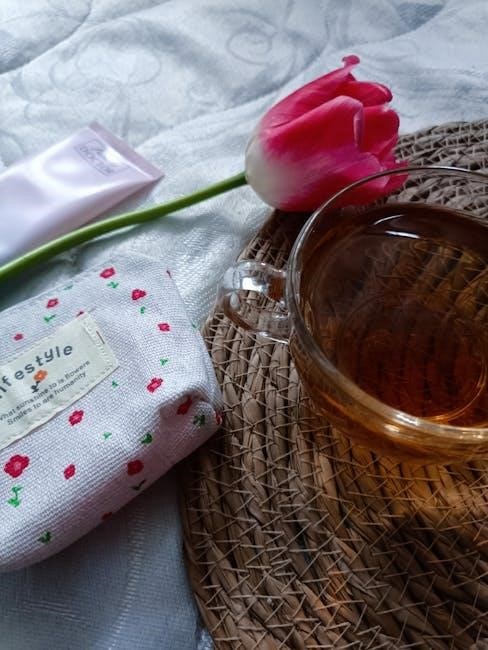
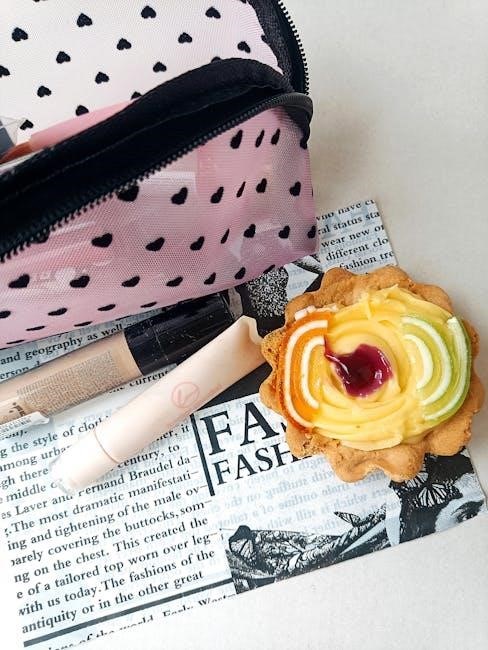
Pouch Sizes and Uses: Makeup Bags, Pencil Cases, Travel Pouches
Zipper pouches are incredibly versatile, adapting to numerous organizational needs․ Consider crafting small pouches, approximately 5․7 inches wide, ideal for cosmetics or holding essential toiletries during travel․ These compact sizes are perfect for fitting into larger bags without taking up excessive space․
For students or artists, a larger rectangular pouch – around 20cm x 10cm x 8cm – provides ample room for pens, pencils, highlighters, and sketch pens․ These pouches help maintain order amidst the chaos of school or creative projects․
Travel pouches benefit from waterproof fabric, safeguarding contents from spills or unexpected weather․ Experiment with different shapes and sizes to accommodate varying travel needs, from electronics accessories to first-aid supplies․ Don’t hesitate to add handles or wrist straps for convenient carrying․ Ultimately, the size and use of your zipper pouch are limited only by your imagination and practical requirements!
Aesthetic Bag Patterns and Free Sewing Patterns
The internet overflows with inspiring aesthetic bag patterns and readily available free sewing patterns for zipper pouches! Explore options ranging from simple square shapes with top handles to more complex designs incorporating unique embellishments․ Many tutorials cater specifically to beginners, utilizing only a regular presser foot – eliminating the need for specialized sewing tools․
Discover patterns for pouches designed to repurpose materials, like polyethylene shopping bags, transforming potential landfill waste into sturdy, waterproof creations․ Websites and online communities offer downloadable templates, simplifying the cutting and sewing process․ Look for patterns that align with your skill level and desired aesthetic․
Don’t be afraid to modify existing patterns to personalize your pouches further․ Experiment with different fabric combinations, zipper colors, and added features like keychains or decorative stitching․ With a little creativity and access to free resources, you can create a collection of beautiful and functional zipper pouches!