
Daikin Air Conditioner Control Panel Instructions: A Comprehensive Guide
Daikin offers diverse control options, from wired BRC1E51A7 & BRC2C51 controllers to wireless remotes and the Zena split system. Modern units, like the Emura, feature pre-installed WiFi modules for internet control via the Daikin Control Assistant app, enhancing user convenience and accessibility.
Understanding Daikin Control Panels
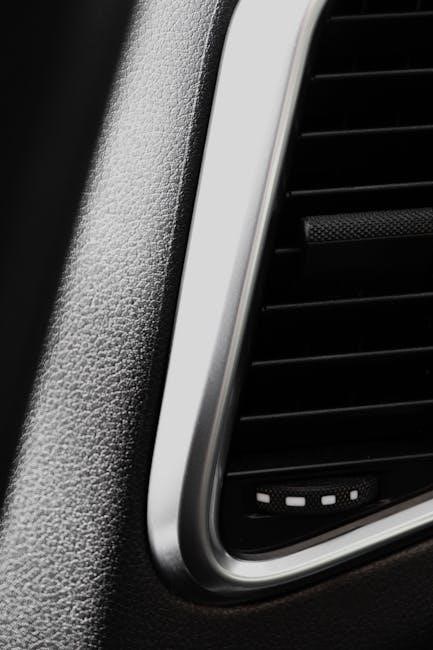
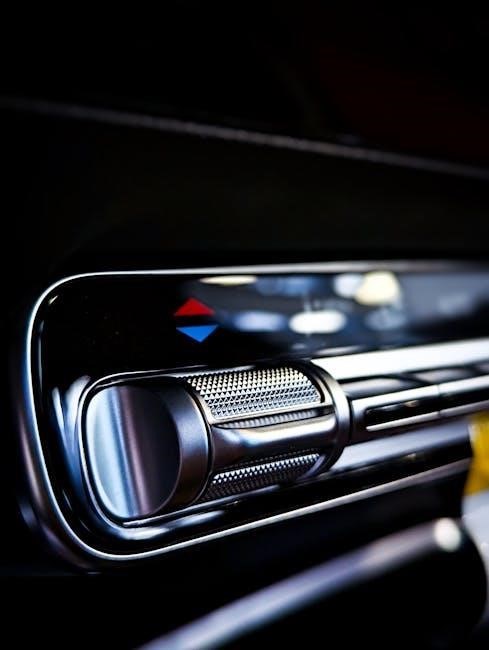
Daikin air conditioner control panels are the central interface for managing your indoor climate, offering a range of functionalities from basic temperature adjustments to advanced scheduling and monitoring. These panels vary significantly depending on the system type – whether it’s a simple split unit, a multi-split system, or a sophisticated ducted air conditioning setup. Understanding these differences is crucial for optimal operation.
Daikin prioritizes user experience, designing panels with clear display screens that indicate the current operating status, selected mode, and set temperature; Compactness and sophistication are key design criteria, ensuring the controllers integrate seamlessly into any interior. The availability of both wired and wireless options caters to diverse installation preferences and needs. Furthermore, Daikin frequently releases specific remote control models tailored to each air conditioner line, ensuring compatibility and optimized functionality. The integration of WiFi modules in newer models, like the Emura, expands control possibilities beyond the physical panel.
Types of Daikin Control Panels
Daikin air conditioner control panels broadly fall into two main categories: wired remote controllers and wireless remote controllers. Wired controllers, such as the BRC1E51A7 and BRC2C51, offer a more robust and feature-rich experience, typically found in larger or more complex installations like VRV systems. These provide precise control and often include advanced settings not available on wireless models.
Wireless remote controllers, on the other hand, are the standard for most residential split units, offering convenience and ease of use. These come in various models, each with slightly different features and layouts. Beyond these traditional options, Daikin also offers zone controllers for ducted systems, allowing independent temperature control in different areas of a building. The Zena split system utilizes its own dedicated control scheme. Finally, the Daikin Control Assistant app provides a digital interface, leveraging WiFi connectivity for remote access and control, effectively acting as a virtual control panel.
Wired Remote Controllers (BRC1E51A7, BRC2C51)
Daikin’s wired remote controllers, like the BRC1E51A7 and BRC2C51, are designed for centralized control and detailed system monitoring. These controllers typically feature a comprehensive display screen showing current operating status, set temperatures, and various system parameters; They offer advanced functionalities beyond basic temperature adjustment, including detailed timer settings, fan speed control, and mode selection (Cool, Heat, Dry, Auto).
The BRC1E51A7 is a popular model known for its user-friendly interface and extensive customization options. The BRC2C51, often used with Daikin VRV systems, provides even more sophisticated control capabilities. These controllers allow for precise adjustments to airflow direction and often include features like economy mode and good night mode. They are ideal for commercial applications or homeowners desiring granular control over their Daikin air conditioning system, offering a level of precision not found in wireless alternatives.
Wireless Remote Controllers
Daikin wireless remote controllers provide convenient and portable control of your air conditioning unit. For each air conditioner line, Daikin frequently releases a specific remote control model, meaning your remote will vary depending on your unit. These remotes generally feature intuitive buttons for power, mode selection (Cool, Heat, Dry, Auto), fan speed adjustment, and temperature settings. They often include timer functions for scheduled operation and swing/airflow direction control for customized comfort.
Understanding the display screen is crucial; it displays the current operating mode, set temperature, and any active features. Many models incorporate icons and codes to indicate specific functions or error states; Battery replacement is a common maintenance task for wireless remotes, ensuring continuous operation. A video tutorial exists demonstrating how to use a Daikin split system remote, offering visual guidance for new users. These controllers prioritize ease of use and accessibility, making climate control simple and straightforward.
Remote Control Model Variations
Daikin air conditioner remote controls exhibit significant model variations, tailored to specific unit lines and features. The BRC1E52B is noted alongside the BRC1E51 for Daikin VRV systems, representing a newer style controller. Different models cater to varying levels of functionality, from basic temperature and mode control to advanced features like economy mode and good night mode. The BRC1E51A7 controller is a commonly referenced model, often found with older systems.
These variations extend beyond aesthetics; internal programming and button layouts differ. Some remotes are designed for simpler residential units, while others are geared towards more complex commercial installations. Understanding your specific model is vital for optimal operation. Referencing the operation manual associated with your air conditioner and remote is crucial for identifying features and troubleshooting. Daikin’s approach ensures compatibility and optimized control for each product line, offering a tailored user experience.
Key Functions on a Standard Daikin Remote
A standard Daikin remote control provides comprehensive command over your air conditioning system. Core functions include the Power button for basic operation, and Mode selection – choosing between Cool, Heat, Dry, and Auto modes to suit your comfort needs. Fan Speed Control allows adjustment of airflow intensity, while Temperature Adjustment enables precise climate setting.
Timer Settings, encompassing both On and Off timers, offer scheduling capabilities for automated operation. Swing or Airflow Direction Control directs air circulation for optimal distribution within the room. The display screen provides vital information, including the current mode, temperature, and any active timer settings. Understanding these functions is key to maximizing efficiency and comfort. The controller’s design prioritizes intuitive operation, allowing users to easily manage their indoor climate. Proper utilization of these features ensures a personalized and energy-efficient experience.
Power Button and Basic Operation
The Power button on your Daikin remote initiates the air conditioning system’s operation. A single press typically turns the unit on, displaying the previously selected settings. Pressing it again shuts down the system, preserving those settings for the next use. Upon activation, the display screen illuminates, showcasing the current operating status, including the selected mode (Cool, Heat, Dry, or Auto) and the set temperature.
Basic operation involves selecting your desired mode and temperature. The unit will then automatically adjust to achieve and maintain the specified climate. Some models feature an initial “fan only” operation for air circulation without heating or cooling. The remote’s interface is designed for simplicity, ensuring ease of use for all users. Understanding this fundamental power function and initial setup is crucial for effective climate control. The system remembers your preferences, offering a seamless experience each time.
Mode Selection: Cool, Heat, Dry, Auto
Daikin air conditioners offer four primary operating modes: Cool, Heat, Dry, and Auto. Cool mode lowers the room temperature by actively removing heat, operating at maximum capacity when initially activated. Heat mode provides warming by extracting heat from the outside air, even in colder temperatures. Dry mode reduces humidity without significant temperature change, ideal for damp environments.
Auto mode intelligently selects between cooling and heating to maintain the set temperature, automatically switching as needed. This mode optimizes energy efficiency and comfort. The selected mode is clearly indicated on the control panel display. Each mode caters to different climate control needs, allowing users to customize their environment. Understanding these modes ensures optimal performance and energy savings. The air conditioner operates with the chosen mode, providing tailored climate control solutions.
Fan Speed Control
Daikin control panels provide adjustable fan speed settings to customize airflow and comfort levels. Typically, options include Auto, Low, Medium, and High. Auto mode automatically adjusts fan speed based on the temperature difference between the room and the setpoint, optimizing energy efficiency. Selecting Low provides a gentle breeze, ideal for quiet operation and maintaining a consistent temperature. Medium offers a balanced airflow, suitable for general comfort.
High delivers maximum airflow for rapid cooling or heating. Some models feature a dedicated “Jet” or “Powerful” mode for even faster temperature adjustments. The current fan speed is displayed on the control panel. Adjusting the fan speed allows users to prioritize comfort, noise levels, or energy savings. Proper fan speed selection contributes to a more pleasant and efficient indoor climate.
Temperature Adjustment
Daikin air conditioner control panels allow precise temperature adjustments to achieve desired comfort levels. Temperature is typically adjusted using the “Up” and “Down” arrow buttons on the remote or the control panel interface. The displayed temperature represents the target room temperature, not necessarily the current room temperature. Most units operate within a range of 16°C to 30°C (61°F to 86°F), though this can vary by model.
The control panel clearly displays the set temperature. Some models offer temperature settings in both Celsius and Fahrenheit. When in Auto mode, the unit automatically selects the appropriate cooling or heating output to maintain the set temperature. Fine-tuning the temperature ensures optimal comfort and energy efficiency. Remember that rapid temperature changes can strain the system, so gradual adjustments are recommended for consistent performance.
Timer Settings: On/Off Timers
Daikin air conditioner control panels frequently include versatile timer functions for automated operation. These typically encompass both “On” timers and “Off” timers, allowing users to schedule when the unit starts and stops. The “On” timer enables the air conditioner to automatically turn on at a pre-set time, providing cooling or heating before you arrive home, for example. Conversely, the “Off” timer allows scheduling the unit to turn off at a specific time, conserving energy while you sleep or are away.
Setting timers usually involves navigating the control panel menu and inputting the desired start and end times. Some models support multiple timer settings for different days of the week. Utilizing these timer functions can significantly reduce energy consumption and enhance convenience. The controller only supports basic timer functionality; advanced scheduling may require the Daikin Control Assistant app.
Swing/Airflow Direction Control
Daikin air conditioner control panels offer comprehensive control over airflow direction, enhancing comfort and optimizing air distribution within a room. The “Swing” function typically controls the vertical movement of louvers, oscillating the airflow up and down. This ensures even cooling or heating across the entire space. Additionally, users can often adjust the horizontal airflow direction – left or right – to target specific areas or avoid direct drafts.
Control panels often feature dedicated buttons or menu options for these adjustments. Some models offer preset swing patterns, while others allow for customized positioning. Proper airflow direction is crucial for maximizing efficiency and preventing discomfort. The Daikin Control Assistant app may provide more granular control over these settings, allowing for precise adjustments from a mobile device. Optimizing airflow contributes to a more comfortable and energy-efficient environment.
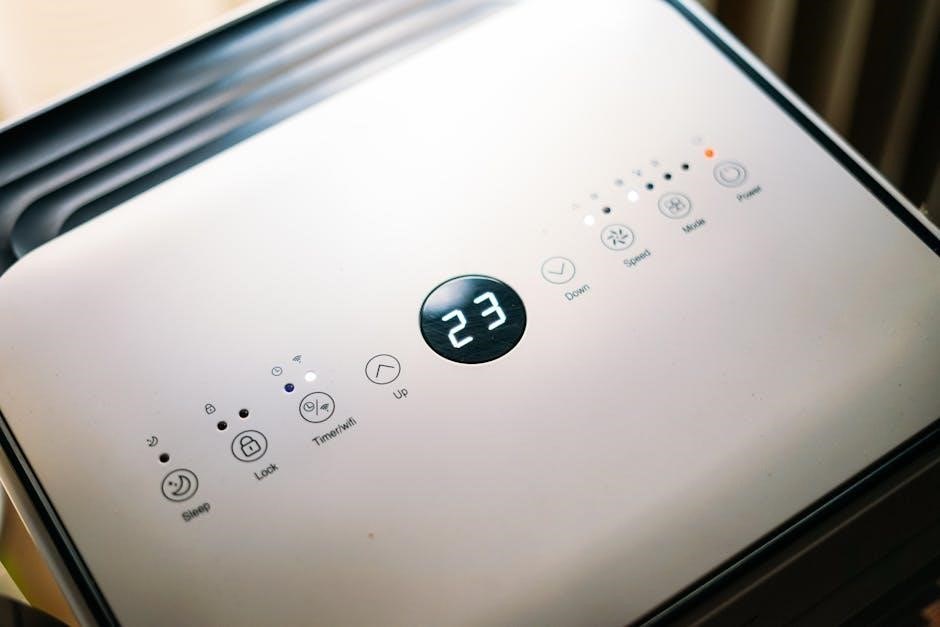
Display Screen Information
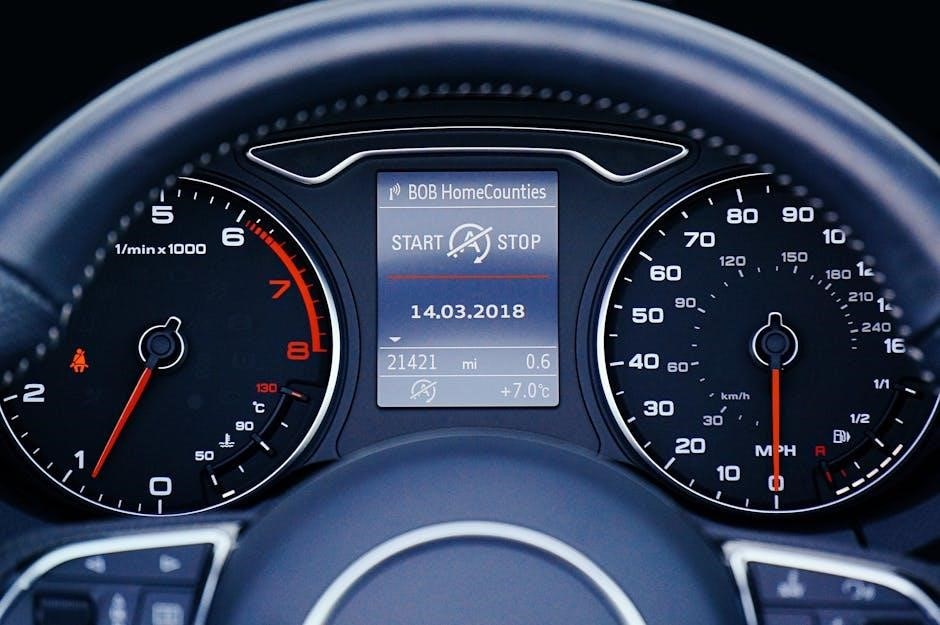
The display screen on a Daikin air conditioner control panel provides crucial operational feedback to the user. It typically showcases the current operating mode (Cool, Heat, Dry, Auto), the set temperature, and the fan speed. Beyond these basics, the screen often displays information about timer settings – whether an On or Off timer is active – and the status of other features like Economy or Good Night mode.
Modern Daikin units utilize the display to communicate error codes, alerting users to potential issues with the system. Understanding these codes is vital for troubleshooting. The screen also presents icons representing various functions, offering a quick visual overview of the air conditioner’s state. Compactness and sophistication are design criteria, making the display user-friendly. The Daikin Control Assistant app mirrors much of this information, providing remote access to the same operational details.
Understanding Icons and Codes
Daikin air conditioner control panels employ a system of icons and error codes to convey information efficiently. Icons visually represent functions like fan speed, airflow direction (swing), and operating modes (Cool, Heat, Dry, Auto). Recognizing these symbols allows for quick adjustments without needing to consult the manual. Error codes, displayed as alphanumeric sequences, indicate specific system malfunctions.
These codes are crucial for troubleshooting; referencing the operation manual or contacting a qualified technician is essential when an error code appears. The controller displays these codes to help diagnose issues. The Daikin Control Assistant app often provides a translation of these codes, offering more user-friendly explanations. Understanding these signals empowers users to address minor problems or accurately describe the issue to a service professional, ensuring prompt and effective repairs. Ignoring these indicators can lead to more significant damage.
Daikin Zena Split System Control
The Daikin Zena split system offers a streamlined control experience, often utilizing a dedicated remote controller designed for its specific features; Operation manuals detail the Zena’s unique interface, focusing on intuitive settings for personalized comfort. Users can manage temperature, fan speed, and operating modes – Cool, Heat, Dry, and Auto – with ease. The Zena system prioritizes energy efficiency, incorporating features accessible through the remote.
Beyond the remote, the Daikin Control Assistant app provides extended control capabilities, including remote access and scheduling. This integration allows users to monitor and adjust settings from anywhere with an internet connection. The Zena system’s control panel is designed for simplicity, ensuring even first-time users can quickly master its functions. Detailed operation manuals are readily available for download, offering comprehensive guidance on maximizing the system’s performance and benefits.
Daikin Ducted System Zone Controller Operation
Daikin ducted systems utilize zone controllers – like the BRC1E51A7 – to manage temperature in individual areas of a building. These controllers allow for independent operation of each zone, optimizing comfort and energy savings. Operation typically involves setting desired temperatures and fan speeds for each zone directly through the controller interface. Advanced features may include scheduling and automated zone control based on occupancy or time of day.

Understanding the controller’s display is crucial; it provides real-time information on zone temperatures, operating modes, and system status. Manuals detail specific functions, including how to override schedules or adjust settings for individual zones. Integration with the Daikin Control Assistant app extends control beyond the physical controller, enabling remote access and monitoring. Proper operation of the zone controller is key to maximizing the efficiency and comfort benefits of a Daikin ducted system.
Using the Daikin Control Assistant App
The Daikin Control Assistant app provides a convenient way to manage your air conditioning system remotely. Compatible with units featuring a WiFi module – such as the Emura FTXG-L – the app allows control via smartphone or tablet. Key features include remote on/off switching, mode selection (Cool, Heat, Dry, Auto), temperature adjustment, and fan speed control. Users can also set timers and schedules for automated operation, optimizing comfort and energy efficiency.
The app’s intuitive interface displays current operating status and allows for detailed monitoring of system performance. Setup requires connecting the air conditioner to your home WiFi network and following the in-app instructions. The Daikin Control Assistant offers in-app documentation for assistance. This app extends the functionality of traditional control panels, providing enhanced convenience and control over your Daikin air conditioning system, even when away from home.
WiFi Module and Internet Control
Many modern Daikin air conditioners, notably the Emura series, come equipped with a pre-installed WiFi module, enabling remote control and monitoring via the internet; This functionality unlocks a new level of convenience, allowing users to adjust settings from anywhere with an internet connection. The Daikin Control Assistant app serves as the primary interface for internet control, offering a user-friendly experience on smartphones and tablets.
Connecting the unit to your home WiFi network is a straightforward process, typically guided by the app itself. Once connected, you can remotely power the unit on or off, change the operating mode, adjust the temperature, and manage fan speeds. Internet control also facilitates integration with smart home ecosystems, allowing for voice control and automated routines. This feature enhances energy efficiency and provides ultimate comfort management, even when you’re away from home, offering a truly connected air conditioning experience.
Troubleshooting Common Control Panel Issues

When encountering issues with your Daikin control panel, several steps can help resolve the problem. First, ensure the batteries in wireless remotes are fresh and correctly installed. If the display is blank, verify the unit is receiving power and the remote sensor isn’t obstructed. For unresponsive controls, try resetting the control panel – consult your specific model’s manual for instructions, as procedures vary.

If error codes appear on the display, refer to the “Error Codes and Their Meanings” section of your manual to understand the issue. Common problems include communication errors between the remote and indoor unit, or sensor malfunctions. If the WiFi connection is unstable, check your router and ensure the Daikin unit is within range. If issues persist, consult the Daikin website for detailed troubleshooting guides or contact a qualified technician for assistance. Proper diagnosis and resolution will restore optimal control.
Error Codes and Their Meanings
Daikin air conditioners utilize error codes to signal specific malfunctions, aiding in diagnosis and repair. These codes appear on the control panel display and are crucial for troubleshooting. For example, codes related to communication issues might indicate a problem with the connection between the indoor and outdoor units, or the remote controller itself. Sensor errors, often denoted by specific numerical codes, suggest a faulty temperature or pressure sensor.
Other common errors relate to refrigerant leaks, compressor failures, or fan motor problems. The operation manual for your specific Daikin model provides a comprehensive list of error codes and their corresponding meanings. It’s vital to consult this manual before attempting any repairs. Ignoring error codes can lead to further damage. If you are unable to interpret the code or resolve the issue, contacting a qualified Daikin technician is highly recommended for professional assistance and safe repair.
Resetting the Control Panel
Occasionally, the Daikin control panel may require a reset to resolve minor operational glitches or restore default settings. The reset procedure varies depending on the type of controller – wired or wireless. For many wireless remotes, removing the batteries for several minutes and then reinserting them can perform a soft reset, clearing temporary memory. Wired controllers often have a dedicated “Reset” button, typically located on the side or back of the unit, requiring a pin or small tool for activation.
Before resetting, note any customized settings, as they will be lost. A full reset might be necessary if the controller displays unusual behavior or fails to respond. Consult your specific Daikin model’s operation manual for detailed reset instructions. If a reset doesn’t resolve the issue, or if the control panel continues to malfunction, professional assistance from a qualified Daikin technician is recommended to diagnose and address potential underlying problems.
Maintaining Your Daikin Control Panel
Regular maintenance ensures the longevity and optimal performance of your Daikin air conditioner control panel. For wireless remotes, prioritize battery replacement when the display dims or becomes unresponsive – avoid letting batteries leak, as this can cause corrosion. Gently wipe the control panel’s surface with a soft, dry cloth to remove dust and fingerprints. Avoid using abrasive cleaners or solvents, as these can damage the display screen and buttons.
Wired controllers require similar care; a dry cloth is sufficient for cleaning. Periodically inspect the wiring connections for any signs of damage or looseness. Ensure the controller is protected from direct sunlight and extreme temperatures. Proper care extends the life of the control panel, preventing malfunctions and ensuring accurate operation of your Daikin air conditioning system. Refer to your model’s manual for specific cleaning recommendations.
Battery Replacement (Wireless Remotes)
Replacing the batteries in your Daikin wireless remote is a straightforward process, crucial for continued operation. Typically, Daikin remotes utilize AAA or AA batteries – consult your specific model’s manual to confirm the correct type and quantity. Locate the battery compartment, usually on the back of the remote, and gently slide open the cover. Remove the old batteries, noting the correct polarity (+ and -) indicated inside the compartment.
Insert the new batteries, ensuring proper alignment with the polarity markings. Close the battery compartment cover securely. If the display doesn’t illuminate or the remote remains unresponsive, double-check the battery installation. Avoid mixing old and new batteries, and always use batteries of the same type. Dispose of used batteries responsibly, following local regulations. Prompt battery replacement prevents operational issues and ensures reliable control of your Daikin air conditioner.
Cleaning the Control Panel
Regular cleaning of your Daikin control panel, whether wired or wireless, is essential for maintaining its functionality and hygiene. Before cleaning, always ensure the air conditioner is switched off. For the remote control, gently wipe the surface with a soft, dry cloth to remove dust and fingerprints. Avoid using abrasive cleaners, solvents, or excessive moisture, as these can damage the buttons and display.
For wired controllers, use a slightly damp cloth – never spray liquid directly onto the unit. Pay attention to the buttons and screen, carefully removing any accumulated dirt. Ensure the control panel is completely dry before resuming operation. A clean control panel not only improves aesthetics but also prevents sticky buttons and ensures accurate operation. Periodic cleaning contributes to the longevity of your Daikin system and maintains a pleasant user experience. Avoid harsh chemicals that could discolor or damage the plastic casing.
Advanced Features: Economy Mode
Daikin air conditioners often include an “Economy Mode” designed to optimize energy consumption while maintaining comfortable temperatures. When activated, this mode intelligently adjusts cooling or heating output, reducing power usage without significant compromise to comfort levels. The system achieves this by subtly modifying setpoint temperatures or fan speeds, operating within a narrower, more efficient range.
Accessing Economy Mode typically involves pressing a dedicated button on the remote control, often indicated by a snowflake or energy-saving icon. The control panel display will confirm when the mode is active. This feature is particularly useful during periods of moderate weather, where full cooling or heating capacity isn’t required. Utilizing Economy Mode can lead to noticeable savings on electricity bills, contributing to a more sustainable and cost-effective home environment. It’s a smart way to enjoy consistent comfort while minimizing your carbon footprint.
Advanced Features: Good Night Mode
Daikin’s “Good Night Mode” is a thoughtfully designed feature intended to create a comfortable sleeping environment while maximizing energy efficiency throughout the night. This mode gradually increases (in cooling) or decreases (in heating) the set temperature over a pre-programmed period, typically several hours, aligning with the body’s natural temperature fluctuations during sleep.
Activation is usually achieved via a dedicated button on the remote control, often symbolized by a moon icon. Once engaged, the air conditioner will slowly adjust the temperature, preventing drastic changes that could disrupt sleep. This gentle adjustment also minimizes energy waste, as the system isn’t constantly working to maintain a fixed temperature. Good Night Mode often incorporates a quiet fan speed setting to further reduce noise levels, ensuring a peaceful night’s rest. It’s a convenient and energy-conscious option for a comfortable sleep.
Understanding R32 Model Operation Manuals
Daikin R32 model operation manuals are crucial for maximizing your air conditioning experience and understanding the specific functionalities of your unit. These manuals detail the operation of the air conditioner, including various modes like cool, heat, dry, and auto, explaining how each impacts room temperature and energy consumption. They provide detailed instructions on utilizing the remote control, covering everything from basic power functions and temperature adjustments to advanced features like timer settings and swing/airflow direction control.
Specifically, R32 manuals outline the operation of the unit with this refrigerant, noting any specific safety precautions or maintenance requirements. They also explain icon meanings displayed on the control panel and provide troubleshooting guidance for common issues. Accessing the manual – often available online as a downloadable PDF (like CTXM15M2V1B models) – ensures you can fully leverage your Daikin system’s capabilities and maintain optimal performance.