
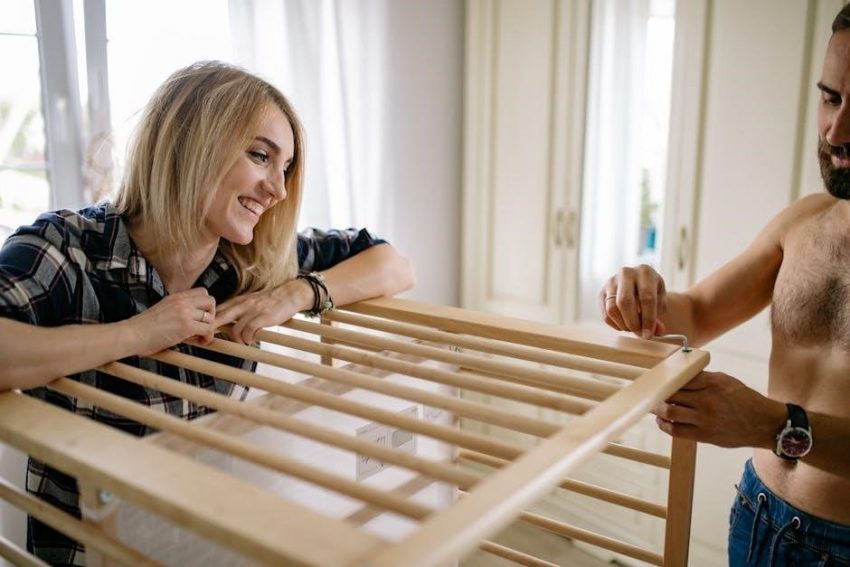
Bassett Furniture crib assembly requires careful attention to detail‚ ensuring a safe and sturdy sleep environment for your baby. Following instructions and videos is crucial for success!
Proper assembly guarantees structural integrity‚ while understanding the crib’s conversion options maximizes its lifespan‚ from infancy to childhood.
Understanding the Importance of Correct Assembly
Correct assembly of your Bassett Furniture crib is paramount for your baby’s safety and well-being. A properly built crib provides a secure and stable sleep space‚ minimizing risks.
Instructions‚ whether from the manual or instructional videos‚ must be followed precisely. Misaligned parts or loose connections can compromise the crib’s structural integrity‚ potentially leading to accidents.
Ensuring all screws and bolts are tightened correctly‚ and understanding the crib’s conversion features‚ contributes to a long-lasting and safe product.
Safety Precautions Before You Begin
Before starting Bassett Furniture crib assembly‚ prioritize a spacious‚ clean‚ and well-lit workspace. Protect your flooring with a drop cloth to prevent scratches during the process.
Keep small parts‚ like screws and bolts‚ away from children to avoid choking hazards. Always refer to the instruction manual for specific safety warnings related to your crib model.
If using a power drill‚ exercise extreme caution and use the appropriate settings to avoid stripping screws or damaging the wood. Adult assembly is strongly recommended.
Unboxing and Parts Identification
Carefully unbox all Bassett Furniture crib components and compare them against the inventory checklist. Identify side rails‚ headboard‚ footboard‚ and all hardware before starting.
Inventory Checklist: Ensuring All Parts are Present
Before beginning Bassett crib assembly‚ meticulously verify all parts listed in the included inventory. This crucial step prevents frustrating delays later. Confirm the presence of the headboard‚ footboard‚ two side rails‚ a mattress support system‚ and all necessary screws and bolts.
Double-check quantities against the manual. Note any missing pieces immediately and contact Bassett Furniture customer support for replacements. A complete inventory ensures a smooth and safe assembly process‚ avoiding potential structural issues.
Identifying Crib Components: Side Rails‚ Headboard‚ Footboard
Accurate identification of crib components is fundamental to successful assembly. The headboard typically features decorative elements and attachment points for the side rails. The footboard‚ often lower in height‚ completes the rectangular frame.
Side rails connect the headboard and footboard‚ forming the perimeter. Carefully examine each piece; some may be specifically designated for left or right sides. Refer to the instruction manual’s diagrams to confirm proper component recognition before proceeding.
Hardware Identification: Screws‚ Bolts‚ and Allen Wrenches
Bassett crib assembly utilizes various hardware components. Screws are commonly used for attaching smaller parts‚ while bolts provide stronger connections for the main frame. An Allen wrench‚ often included‚ is essential for tightening these bolts.
Carefully sort and identify each type of fastener. The instruction manual will specify which hardware to use for each step. Losing or misidentifying these parts can significantly delay the assembly process‚ so organization is key.

Step-by-Step Assembly Guide
Assembly begins with attaching side rails to the headboard and footboard‚ then securing the mattress support. Follow the instructions carefully for a stable crib!
Attaching Side Rails to Headboard and Footboard
Carefully align the side rails with the pre-drilled holes on both the headboard and footboard. Utilize the provided bolts and screws‚ ensuring they are hand-tightened initially.
Avoid over-tightening at this stage to allow for adjustments. Double-check the alignment before fully tightening with the Allen wrench. Proper alignment is crucial for the crib’s stability and safety.
Refer to the Bassett furniture instruction manual for specific bolt placement and torque recommendations. Ensure all connections are secure‚ creating a solid frame foundation.
Securing the Mattress Support System
Locate the mattress support hooks or brackets within the crib frame. Carefully position the support system at the desired height‚ ensuring it’s level on both sides. Secure it using the designated screws or bolts‚ tightening them firmly.
Verify the support system is locked into place and cannot be easily dislodged. Proper installation is vital for preventing accidental falls and ensuring a safe sleep surface.
Consult the Bassett furniture instruction manual for specific height adjustments and hardware details. Regularly inspect the support system for looseness.
Installing the Drop-Side Mechanism (If Applicable)
If your Bassett crib features a drop-side‚ carefully attach the side rail brackets to the crib frame‚ following the instruction manual precisely. Ensure the locking mechanism is correctly aligned and functions smoothly.
Test the drop-side repeatedly to confirm it raises and lowers effortlessly‚ and locks securely in both positions. Prioritize safety; a faulty drop-side poses a significant risk.
Double-check all connections and hardware‚ tightening as needed. Be aware that newer safety standards often discourage drop-side cribs.
Assembling the Crib Frame: Tightening All Connections
Once the headboard‚ footboard‚ and side rails are connected‚ meticulously tighten all screws‚ bolts‚ and hardware. Use the provided Allen wrenches‚ applying firm‚ even pressure. Avoid over-tightening‚ which can strip the screws or damage the wood.
Regularly inspect each connection point‚ ensuring everything is secure and stable. A wobbly frame indicates loose hardware that needs attention. Prioritize a robust structure for your baby’s safety.
Re-tighten connections periodically‚ especially after initial use‚ to maintain stability.

Converting Your Bassett Crib
Bassett cribs offer versatile conversions – toddler bed‚ daybed‚ or full-size bed – extending usability. Removing side rails initiates the toddler bed phase‚ while conversion kits unlock further options.
Converting to a Toddler Bed: Removing Side Rails
Transitioning your Bassett crib to a toddler bed is a straightforward process‚ primarily involving the removal of one or both side rails. Carefully detach the rails following the reverse steps of the initial assembly‚ ensuring all hardware is safely stored.
This creates a lower‚ more accessible sleeping space for your growing child. Always refer to your specific crib model’s instructions for precise guidance‚ as procedures may vary. Prioritize safety by verifying all remaining components are securely fastened before introducing the toddler bed configuration.
Transitioning to a Daybed Configuration
Converting your Bassett crib into a daybed typically involves removing both side rails and the drop-side mechanism (if applicable)‚ creating an open platform. Ensure all hardware is safely stored away from children. This configuration offers a versatile space for rest and play.
Always consult your crib’s specific instructions for detailed steps‚ as procedures can differ between models. Double-check the stability of the resulting daybed frame before use‚ verifying all connections remain secure. A daybed provides a comfortable transition as your child grows.
Full-Size Bed Conversion: Purchasing and Installing Conversion Kit
To convert your Bassett crib to a full-size bed‚ a dedicated conversion kit is essential‚ purchased separately from Bassett Furniture or authorized retailers. The kit typically includes headboard/footboard extensions and supporting legs.
Carefully follow the instructions provided with the kit‚ ensuring proper alignment and secure attachment of all components. This conversion extends the crib’s usability for years. Prioritize safety by verifying the bed’s stability before use‚ and always use a suitable mattress.

Troubleshooting Common Assembly Issues
Assembly hiccups like missing parts or misaligned holes are common. Double-check the inventory‚ and carefully re-examine instructions for correct alignment and tightening.
Dealing with Missing Parts
Discovering missing parts during Bassett crib assembly is frustrating‚ but resolvable. First‚ meticulously re-check all packaging materials – sometimes smaller items are hidden!
If a part is genuinely absent‚ immediately contact Bassett Furniture customer support. They are equipped to quickly ship replacements‚ ensuring minimal delay.
Alternatively‚ explore online resources for replacement hardware‚ but prioritize official Bassett channels for guaranteed compatibility and safety. Never substitute parts without verification.
Addressing Misaligned Holes
Misaligned holes during Bassett crib assembly can occur‚ but don’t immediately assume a defect. Gently loosen surrounding screws to allow for slight adjustments in the frame.
Avoid forcing screws – this can strip the wood or damage the hardware. If misalignment persists‚ double-check the orientation of the parts‚ referencing the instruction manual’s diagrams.
A rubber mallet can sometimes help nudge pieces into alignment. If issues remain‚ contact Bassett customer support for guidance before proceeding.
Tightening Loose Screws and Bolts
Regularly inspect all screws and bolts on your Bassett crib‚ as they can loosen with use. Use the provided Allen wrenches or appropriate screwdrivers for tightening‚ avoiding over-tightening which can damage the wood.
Pay close attention to connections between the side rails‚ headboard‚ and footboard. A slight wobble indicates a need for tightening.
Consistent checks ensure the crib’s stability and safety‚ preventing potential hazards. Prioritize safety by maintaining secure connections throughout the crib’s lifespan.

Bassett Crib Specific Models & Instructions
Bassett cribs require referencing their unique instruction manual for precise‚ model-specific steps and safety warnings. Addison‚ Harmony‚ and Willow models vary!
Addison Crib Assembly Details
Addison crib assembly begins with identifying all components – side panels‚ headboard‚ footboard‚ mattress support‚ screws‚ and bolts – and laying them out on a protected surface.
Attach the side panels to the headboard and footboard‚ ensuring proper alignment before fully tightening connections. Secure the mattress support system at the desired height‚ verifying stability.
Converting the Addison to a toddler bed involves removing the side rails‚ as demonstrated in instructional videos. Always consult the official Bassett manual for specifics!
Harmony Crib Assembly Details
Harmony crib assembly prioritizes a smooth process‚ starting with careful parts identification – side rails‚ headboard‚ footboard‚ and all associated hardware. Lay everything out for easy access.
Attach side rails to the headboard and footboard‚ ensuring a snug fit before fully tightening screws and bolts. Double-check alignment to prevent instability. Secure the mattress support system firmly.
Refer to Bassett’s official instruction manual and available videos for model-specific guidance. Proper assembly ensures a safe and comfortable sleep space for your little one.
Willow Crib Assembly Details
Willow crib assembly begins with a thorough inventory of all components – side panels‚ headboard‚ footboard‚ mattress support‚ and necessary hardware. A flat‚ protected surface is essential for organization.
Carefully attach the side panels to the headboard and footboard‚ ensuring proper alignment before tightening all connections. Secure the mattress support system at the desired height.
Consult Bassett’s detailed instruction manual and supplemental videos for specific guidance related to the Willow model. Prioritize safety and stability throughout the entire process.

Tools Required for Assembly
Essential tools include screwdrivers and Allen wrenches‚ often provided. A rubber mallet aids gentle fitting‚ while a power drill (used cautiously) can expedite screw insertion.
Essential Tools: Screwdrivers‚ Allen Wrenches
Bassett crib assembly fundamentally relies on screwdrivers and Allen wrenches. Most cribs include the necessary Allen wrenches‚ specifically sized for the provided hardware. However‚ possessing a set of screwdrivers – both Phillips head and flathead – offers versatility.
Ensure screwdrivers have magnetic tips to prevent dropped screws during assembly. Using the correct size and type of screwdriver is vital to avoid stripping screw heads. Allen wrenches should be inserted fully into the bolt head before applying pressure to prevent damage.
Recommended Tools: Rubber Mallet‚ Power Drill (with caution)
A rubber mallet gently encourages snug fits between crib components‚ avoiding damage from forceful hammering. It’s particularly useful for aligning wooden pieces during frame assembly. A power drill can expedite screw insertion‚ but exercise extreme caution!
Use a low torque setting to prevent stripping screws or damaging the wood. Always finish tightening screws by hand to avoid over-tightening. Incorrect drill usage can compromise the crib’s structural integrity and safety. Prioritize manual tightening whenever possible;
Finding Replacement Parts
Bassett Furniture customer support and online resources offer replacement hardware for missing or damaged crib components‚ ensuring continued safety and functionality.
Contacting Bassett Furniture Customer Support
Bassett Furniture’s customer support is a valuable resource when needing replacement parts or clarification during assembly. You can typically reach them via phone‚ listed on their official website‚ or through their online contact form.
Be prepared to provide your crib’s model number and a detailed description of the needed part. Having proof of purchase readily available can expedite the process. Their team can assist with identifying the correct hardware and arranging shipment.
Prompt and helpful service ensures a smooth resolution to any parts-related issues.
Online Resources for Replacement Hardware
Several online platforms offer replacement hardware for Bassett Furniture cribs‚ supplementing direct contact with customer support. Websites specializing in furniture parts often stock common screws‚ bolts‚ and drop-side mechanisms.
Carefully verify compatibility by cross-referencing part numbers and dimensions before ordering. Online marketplaces can also be a source‚ but ensure the seller is reputable and offers returns.
Always prioritize genuine Bassett parts when possible to maintain safety and structural integrity.
Safety Standards and Certifications
Bassett cribs adhere to stringent safety regulations‚ often achieving JPMA certification. This ensures the crib meets current standards for stability and non-toxicity.
Verification of these certifications provides peace of mind regarding your baby’s sleep environment.
Understanding JPMA Certification
JPMA (Juvenile Products Manufacturers Association) certification signifies a Bassett crib has undergone rigorous third-party testing for safety and structural integrity. This isn’t a legal requirement‚ but a voluntary commitment to exceeding safety standards.
JPMA testing evaluates aspects like slat strength‚ hardware reliability‚ and overall stability‚ ensuring the crib minimizes risks of entrapment or collapse. Look for the JPMA seal – it indicates the crib meets or exceeds all applicable safety regulations‚ offering parents confidence in their purchase and a secure sleep space for their child.
Ensuring Crib Meets Current Safety Regulations
Bassett Furniture designs cribs to comply with evolving US Consumer Product Safety Commission (CPSC) regulations. Current standards prioritize slat spacing to prevent infant head entrapment and hardware durability to resist loosening.
Proper assembly‚ following the instruction manual‚ is vital for maintaining compliance. Regularly inspect the crib for loose screws or damaged components. Avoid modifying the crib in any way‚ as alterations can compromise its safety features and void any certifications. A safe crib is a properly assembled crib!
Maintaining Your Bassett Crib
Regular inspections for loose hardware are essential for continued safety. Clean the crib with mild soap and water‚ ensuring all parts remain secure and stable.
Regularly Inspecting for Loose Hardware
Consistent checks are paramount to maintaining a safe sleep environment. Periodically‚ examine all screws‚ bolts‚ and connections within the Bassett crib frame. Gently attempt to wiggle each component; any movement indicates a potential loosening issue.
Tighten any loose fasteners immediately using the appropriate Allen wrench or screwdriver. Don’t overtighten‚ as this could strip the threads or damage the wood. A proactive approach to hardware inspection prevents potential hazards and ensures the crib’s long-term stability.
Cleaning and Care Instructions
Routine cleaning preserves your Bassett crib’s beauty and hygiene. Use a damp cloth with mild soap to wipe down all surfaces‚ avoiding abrasive cleaners that could damage the finish. Always ensure the crib is completely dry before placing a mattress or bedding inside.
Avoid using harsh chemicals or solvents. For stubborn stains‚ consult Bassett Furniture’s care guidelines. Regular dusting prevents buildup‚ and periodic inspection for damage maintains the crib’s structural integrity and safe functionality.
Where to Find Assembly Videos
Official Bassett Furniture provides helpful assembly videos on their website. Additionally‚ numerous instructional videos are available on platforms like YouTube for guidance.
Official Bassett Furniture Assembly Videos
Bassett Furniture’s official website is the primary source for dedicated assembly videos tailored to their crib models. These videos offer a clear‚ step-by-step visual guide‚ ensuring accurate assembly.
They demonstrate proper techniques‚ highlight key connection points‚ and address potential challenges. Accessing these resources directly from Bassett guarantees compatibility with your specific crib and adherence to their safety standards.
Look for model-specific playlists or search using your crib’s name for the most relevant instructional content. These videos are designed to simplify the process!
Third-Party Instructional Videos on YouTube
YouTube hosts numerous assembly guides created by customers sharing their experiences with Bassett cribs. While helpful‚ exercise caution when using these resources. Verify the video matches your specific crib model to avoid incorrect instructions.
Pay close attention to the assembler’s techniques and compare them to Bassett’s official manual. User-generated content can offer alternative perspectives‚ but always prioritize safety and accuracy.
Understanding the Instruction Manual
Bassett cribs feature detailed instruction manuals with diagrams and sequential steps. Deciphering these illustrations is key for a smooth and safe assembly process.
Model-specific guidance and safety warnings are included.
Decoding Diagrams and Illustrations
Bassett Furniture assembly manuals heavily rely on visual aids. Diagrams showcase component orientation and connection points‚ while illustrations clarify screw and bolt placement.
Pay close attention to arrow directions indicating part alignment. Exploded views depict how pieces fit together‚ simplifying complex steps. Identifying hardware through detailed drawings prevents errors.
Understanding these visuals is paramount; they often supersede written instructions. Carefully correlate each image with the corresponding step for optimal results and a secure crib build.
Following Sequential Steps for Optimal Results
Bassett Furniture crib assembly demands strict adherence to the provided sequence. Skipping steps or altering the order can compromise structural integrity and safety.
Begin with unboxing and parts identification‚ then proceed methodically through each stage – frame assembly‚ mattress support‚ and any drop-side mechanisms.
Double-check connections after each step‚ ensuring all hardware is securely fastened. A logical progression minimizes errors and guarantees a stable‚ safe sleeping environment for your child. Patience is key!

Final Inspection and Safety Check
Ensure all connections are tight and secure after assembly. Verify the crib’s stability and structural integrity before use‚ prioritizing your baby’s safety!
Double-Checking All Connections
Thoroughly inspect every screw‚ bolt‚ and joint within the Bassett crib frame. Gently attempt to wiggle each component to confirm a secure fit; any movement indicates a need for tightening.
Pay close attention to the mattress support system‚ ensuring it’s firmly attached and level. Re-examine the drop-side mechanism (if present) for smooth‚ reliable operation.
A final‚ meticulous check of all connections is paramount for preventing potential hazards and guaranteeing a safe‚ stable sleeping environment for your child.
Ensuring Stability and Structural Integrity
Prioritize a wobble-free foundation by testing the assembled Bassett crib’s stability. Apply gentle‚ consistent pressure to each side‚ observing for any signs of imbalance or flexing.
Confirm the headboard and footboard are securely fastened to the side rails‚ creating a rigid frame. Verify the mattress support system is level and can withstand weight without sagging.
Structural integrity is non-negotiable; a stable crib minimizes risks and provides a safe‚ dependable sleep space for your baby‚ offering peace of mind.