

End Grain Cutting Board Plans PDF: A Comprehensive Guide
Discover detailed plans for crafting stunning end grain cutting boards, ranging from beginner-friendly designs to expert-level projects, utilizing resources like video tutorials and essential tool lists.
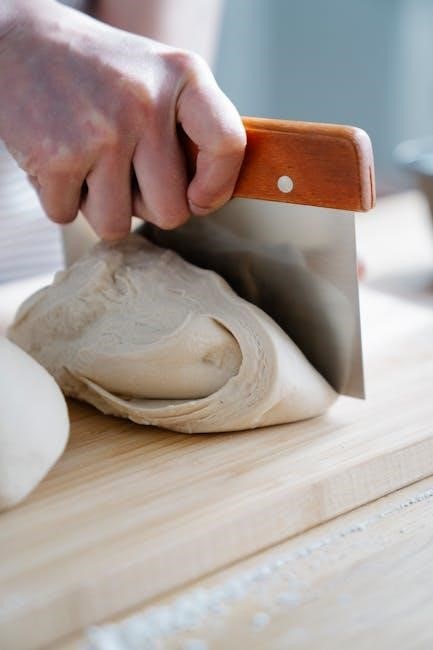
End grain cutting boards represent a pinnacle of woodworking, prized for their beauty, durability, and knife-friendliness. Unlike edge grain or face grain boards, these are constructed by adhering numerous small pieces of wood on their ends, revealing the wood fibers.
This orientation provides a self-healing surface, as the fibers absorb impact rather than being sliced. Exploring end grain construction unlocks a world of design possibilities, from simple checkerboards to intricate herringbone patterns. PDF plans offer a structured approach, guiding you through each step of the process, ensuring a successful build.
Why Choose End Grain? (Benefits & Durability)
End grain cutting boards offer superior benefits compared to other types. The vertical grain is gentler on knife edges, minimizing dulling and extending their lifespan. Furthermore, they exhibit remarkable durability, resisting warping and cracking due to the inherent stability of the end grain construction.
PDF plans often highlight this resilience. They are also more hygienic, as the fibers naturally close after being cut, reducing bacterial absorption. Investing in an end grain board, guided by detailed plans, provides a lasting, beautiful, and functional kitchen tool.
Wood Selection for End Grain Boards
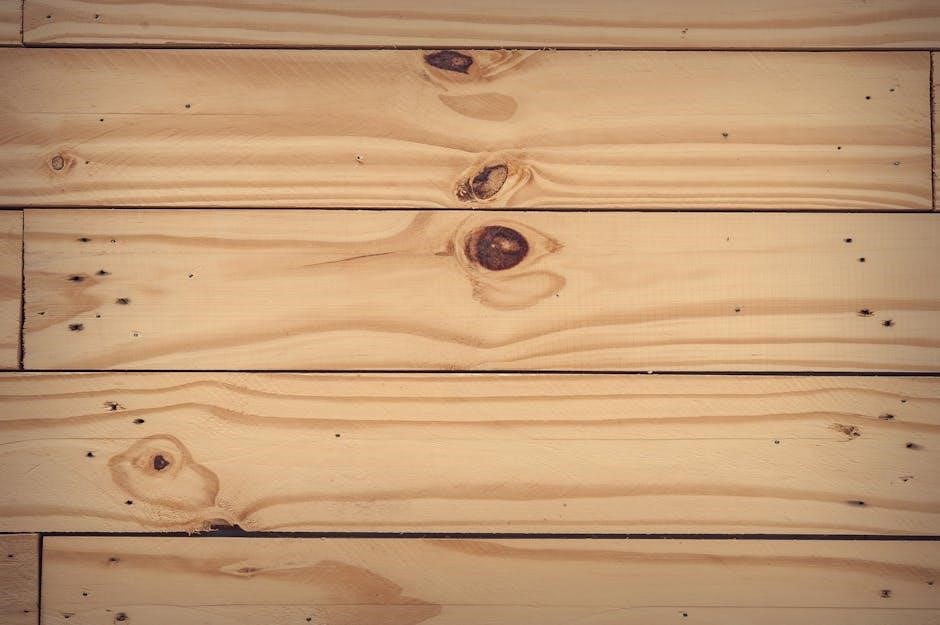
Choosing the right wood is crucial for a durable and beautiful end grain board. PDF plans frequently emphasize hardwoods like maple, walnut, and cherry due to their density and appealing aesthetics. Maple offers a light color and tight grain, while walnut provides a rich, dark tone.
Cherry develops a beautiful patina over time. Understanding wood grain orientation – straight, interlocked, or figured – impacts stability and visual appeal. Carefully selected wood, as detailed in plans, ensures a long-lasting, high-quality cutting surface.
Hardwood Choices: Maple, Walnut, Cherry
PDF plans consistently recommend maple, walnut, and cherry for end grain boards. Maple, a light-colored, dense wood, resists wear and is ideal for food preparation. Walnut offers a stunning dark hue and beautiful grain patterns, adding elegance.
Cherry, known for its reddish tones, deepens with age, developing a rich patina. These hardwoods are favored for their stability, durability, and food safety. Selecting quality lumber, as outlined in plans, is paramount for a lasting board.
Understanding Wood Grain & Orientation
PDF guides emphasize the importance of grain direction in end grain construction. End grain, exposing the wood fibers perpendicularly, provides a self-healing cutting surface. Alternating grain orientation during glue-up minimizes warping and enhances stability.
Plans detail how to arrange wood strips to interlock fibers, creating a robust board. Understanding grain patterns helps maximize visual appeal and structural integrity. Proper orientation is crucial for preventing cracks and ensuring longevity.
Essential Tools & Materials
Comprehensive end grain cutting board PDF plans detail necessary tools: saws (table, miter), planers, sanders, and clamps. Materials include selected hardwoods, food-safe wood glue, mineral oil, and potentially beeswax for finishing.
Resources often list specific clamp types – pipe clamps are favored – alongside smaller F-clamps for localized pressure. Scrapers and sanding blocks are vital for surface preparation. Detailed plans specify grit levels for optimal smoothing and finishing results.
Cutting & Shaping Tools (Saws, Planers)
Essential for end grain boards, a table saw ensures precise strip cutting for glue-up. A miter saw aids in accurate angle cuts for patterns. Plans emphasize the importance of a jointer and planer for achieving perfectly flat, square stock.
Random orbital sanders are crucial for smoothing surfaces. Scrapers refine the finish before oiling. Quality blades and sharp planer knives are paramount for clean cuts and minimizing tear-out, impacting the final product’s aesthetic.
Adhesives: Choosing the Right Wood Glue
For end grain boards, a waterproof wood glue is critical due to moisture exposure. Titebond III is frequently recommended in plans for its strength and water resistance. Avoid aliphatic resin glues, as they aren’t waterproof.
Ensure adequate open time for glue-up, allowing repositioning of strips. Proper glue application—even and consistent—is vital for a strong bond. Follow manufacturer instructions regarding clamping pressure and cure time for optimal results.
Clamping Systems: Pipe Clamps & Alternatives
Effective clamping is essential for a successful end grain glue-up. Pipe clamps are a popular choice, providing even pressure across the board’s surface. Numerous plans suggest using a sufficient number – often every 2-3 inches.
Alternatively, consider using F-clamps or a combination. Ensure clamps are positioned squarely to prevent warping. Consistent pressure distribution is key; cauls can help achieve this. Proper clamping prevents gaps and ensures a robust, lasting bond.
Designing Your End Grain Cutting Board
Careful design is crucial before starting. Consider the intended use – a small board for cheese differs from a large carving board. Plans often detail size and thickness recommendations, typically 1.5 to 2 inches thick.
Popular pattern options include the classic checkerboard, elegant herringbone, and simple brick layouts. Visualize the final product and choose a design that complements your wood selection. Detailed plans will provide cutting lists and assembly diagrams.
Board Size & Thickness Considerations
Selecting the right dimensions is vital for functionality and stability. Generally, boards intended for heavy use, like carving, benefit from larger sizes – 18×24 inches or bigger. Thickness should be at least 1.5 inches, ideally 2 inches, to accommodate sanding and prevent warping.
PDF plans frequently offer multiple size options. Smaller boards, around 12×16 inches, are suitable for cheeses or bread. Consider the weight; thicker boards are heavier but more durable.
Pattern Options: Checkerboard, Herringbone, Brick
End grain boards showcase beautiful patterns! Checkerboard is classic, requiring precise strip cutting and alternating wood species. Herringbone offers a more dynamic look, demanding angled cuts and careful alignment. Brick patterns are simpler, using rectangular blocks for a rustic aesthetic.
PDF plans often detail cutting diagrams for each pattern. Consider wood color contrast to enhance the design. Complex patterns increase material waste and glue-up difficulty.
Preparing the Wood for Glue-Up
Precise milling is crucial for a successful glue-up. PDF plans emphasize achieving square, consistent thickness across all strips. Use a jointer and planer to ensure flat, smooth surfaces. Accurate dimensions minimize gaps and alignment issues during assembly.
Cutting strips to the specified width and length, as detailed in your chosen plan, is essential. Dry-fit the arrangement before applying glue to verify the pattern and fit.
Milling the Wood to Precise Dimensions
PDF plans consistently highlight the importance of accurately milled lumber. Begin by jointing one face and one edge of each board to establish perfectly flat references. Subsequently, plane the opposite face parallel to the first, achieving the desired thickness.
Finally, rip the boards to the required width, maintaining square edges. Consistent thickness and width are vital for a tight, seamless glue-up, preventing uneven surfaces.
Cutting Strips for End Grain Assembly
Most end grain cutting board PDF plans instruct you to cut the milled lumber into strips, typically ranging from ¾ inch to 1 ½ inches wide. Precise and consistent strip width is crucial for the final checkerboard or desired pattern.

Utilize a reliable crosscut sled on your table saw to ensure square, uniform cuts. Remember to account for blade kerf when calculating strip lengths for your chosen board size.
The Glue-Up Process: Step-by-Step
Begin by laying out your prepared end grain strips, ensuring the grain orientation alternates for optimal strength. Apply a generous, even coat of wood glue to each strip’s edge, avoiding excessive amounts that will cause messy squeeze-out.
Carefully assemble the strips, pressing them firmly together. Immediately apply clamping pressure using pipe clamps or an alternative system, distributing it evenly across the board’s surface.
Applying Glue Evenly & Effectively
Ensure complete coverage by using a glue roller or brush to spread adhesive across each strip’s edge, penetrating the wood fibers for a robust bond. Avoid applying too much glue, as excessive squeeze-out complicates cleanup and weakens the joint.
Work quickly to maintain glue’s plasticity, and consider using a glue spreader for consistent application. Remember, even distribution is key to a durable, long-lasting end grain cutting board.
Clamping Pressure & Techniques
Apply consistent, even pressure across the entire glue-up using pipe clamps or alternatives like F-clamps, ensuring tight joints. Distribute clamps strategically, spacing them every 6-8 inches for optimal compression. Avoid over-tightening, which can starve the joint of glue.
Use cauls – straight pieces of wood – to distribute pressure evenly and prevent bowing. Check alignment frequently during clamping, and allow sufficient drying time – typically 24 hours – before removing clamps.
Post-Glue-Up: Cleaning & Flattening
Remove excess dried glue meticulously using a scraper, ensuring a clean surface for further processing. Smooth any remaining residue with a hand plane or card scraper. Flattening is crucial; utilize a hand plane for a traditional approach, or employ power tools like a jointer or planer for efficiency.
Maintain a flat, even surface to guarantee stability and functionality. Check for any unevenness and address it before proceeding to sanding, ensuring a professional finish.
Removing Excess Glue & Smoothing Surfaces
Begin by carefully scraping away the bulk of dried glue with a sharp scraper, working along the grain to avoid damaging the wood; Follow this with a card scraper for finer glue residue removal, ensuring a smooth transition. Inspect the surface meticulously for any remaining glue spots.
Utilize a smoothing plane to level minor imperfections and prepare the board for flattening, achieving a consistently even surface. This step is vital for a professional, high-quality finish.
Flattening the Board: Hand Plane vs. Power Tools
For flattening, a hand plane offers precise control and a traditional approach, ideal for smaller boards and achieving a beautifully smooth surface. However, power tools like a jointer or planer expedite the process for larger boards, ensuring consistent flatness.
Consider the board’s size and your skill level when choosing. Power tools require careful setup to avoid removing too much material, while hand planing demands practice and technique.
Sanding & Finishing
Achieving a flawless finish begins with progressive sanding, starting with coarser grits (80-120) to remove imperfections, then moving to finer grits (180-220, and even 320) for ultimate smoothness. Thorough sanding prepares the wood to receive a food-safe finish.
Popular choices include mineral oil, which penetrates and protects, and beeswax, offering a natural sheen. Regular oiling maintains the board’s beauty and prevents drying, ensuring longevity and food safety.
Sanding Progression: Grit Levels & Techniques
Begin with 80-grit sandpaper to address any milling marks or unevenness, followed by 120-grit to refine the surface. Transition to 180-grit for smoothing, then 220-grit to prepare for finish. Consider a final pass with 320-grit for an exceptionally silky feel.
Always sand with the grain to avoid scratches. Utilize a sanding block for even pressure and consistent results. Vacuum frequently to remove dust and assess progress.
Food-Safe Finishes: Mineral Oil, Beeswax
Mineral oil is a classic choice, penetrating the wood to prevent drying and cracking, requiring regular reapplication. Beeswax offers a natural, protective barrier, often combined with mineral oil for enhanced durability and a subtle sheen.
Apply several coats, allowing each to absorb fully before adding the next. Ensure the finish is food-grade, avoiding those with additives. Buff to a smooth, satin finish for optimal protection and aesthetics.
Adding Features & Customization
Elevate your cutting board with personalized touches! Consider incorporating juice grooves to contain liquids during food preparation, enhancing functionality and preventing messes. Adding rubber feet to the board’s underside provides stability, preventing slippage on countertops.
Explore engraving designs or inlays for a unique aesthetic. Remember to use food-safe materials and finishes for all customizations, ensuring the board remains safe for culinary use.
Juice Grooves: Design & Implementation
Strategically placed juice grooves prevent liquids from spreading across your cutting board. Design them with a slight slope towards a collection point for easy pouring. Utilize a router with a round-over bit or a carving tool to create smooth, defined grooves.
Ensure the grooves are deep enough to contain liquids but not so deep they hinder cleaning. Consider the board’s overall aesthetic when determining groove placement and shape.
Rubber Feet: Preventing Slippage
Adding rubber feet to your end grain cutting board significantly enhances stability during use, preventing unwanted sliding on countertops. Select self-adhesive rubber bumpers or screw-in feet for a secure attachment.
Position the feet at each corner of the board, ensuring even weight distribution. Consider the countertop surface when choosing foot material; softer rubber is ideal for delicate surfaces.
Troubleshooting Common Issues
Addressing challenges is crucial when building end grain boards. Wood movement can cause cracking; proper acclimation and board design minimize this. Glue failure often stems from insufficient clamping pressure or improper glue application – ensure even coverage.
Separation can occur if surfaces weren’t adequately prepared. Inspect for these issues during flattening and sanding, and address them promptly for a durable, lasting cutting board.
Dealing with Wood Movement & Cracking
Wood’s natural expansion and contraction with humidity changes can lead to cracking. Acclimate wood properly before milling to minimize stress. Design boards with breadboard ends or allow for movement in the construction.
Small cracks can sometimes be stabilized with thin CA glue. Preventative measures, like consistent humidity control and proper finishing, are key to long-term stability and avoiding significant damage.
Addressing Glue Failure & Separation
Glue failure often stems from insufficient clamping pressure or improper glue application. If separation occurs, carefully clean both surfaces, removing old adhesive completely. Re-glue using a high-quality wood glue, ensuring even coverage and ample clamping pressure.
For minor gaps, wood filler can be used after re-gluing, but structural repairs may require reinforcing the joint with dowels or biscuits for lasting durability.
Finding Free End Grain Cutting Board Plans PDF
Numerous online resources offer free end grain cutting board plans in PDF format. Websites and forums dedicated to woodworking frequently host user-submitted designs, ranging in complexity. Popular platforms include woodworking blogs and online communities where enthusiasts share their projects.
Always evaluate plan quality, checking for clear instructions, detailed diagrams, and a complete materials list before starting your build.
Popular Online Resources & Websites
Explore sites like Woodsmith Plans and Fine Woodworking for potential free plans or affordable options; YouTube channels dedicated to woodworking, such as those featuring project builds, often link to downloadable plans in their descriptions.
Additionally, websites like Instructables and woodworking forums host user-created plans, offering a diverse range of designs. Remember to verify the plan’s completeness and clarity before committing to a project.
Evaluating Plan Quality & Completeness
Assess plans for detailed material lists, specifying wood types, dimensions, and adhesive requirements. Look for clear, step-by-step instructions accompanied by illustrative diagrams or photos. Ensure the plan includes crucial details like glue-up pressure, clamping techniques, and finishing recommendations.
Verify the plan addresses potential challenges, such as wood movement, and offers solutions. A high-quality plan will empower you to confidently execute the project and achieve professional results.
Advanced Techniques: Bowtie Inlays
Elevate your craftsmanship with decorative bowtie inlays, adding both visual appeal and structural reinforcement to your end grain boards. These inlays counteract wood movement, preventing cracks and enhancing longevity. Explore plans detailing precise cutting and fitting techniques for various wood species.
Master the art of creating contrasting inlays using different wood tones. Bowtie inlays transform a functional cutting board into a stunning centerpiece, showcasing advanced woodworking skills.
Maintaining Your End Grain Cutting Board
Preserve the beauty and functionality of your end grain board with a consistent care routine. Regular cleaning with mild soap and water, followed by thorough drying, prevents bacterial growth. Periodic oiling – using food-grade mineral oil or beeswax – replenishes moisture and prevents cracking.
Avoid harsh detergents and prolonged soaking. Implement a schedule of oiling every few weeks, or as needed, to maintain optimal condition. Proper care ensures years of reliable use and lasting beauty.
Cleaning & Oiling Schedule
Establish a routine for optimal board health. After each use, hand wash with warm, soapy water and dry immediately – avoid dishwashers! Weekly, or as needed, apply a generous coat of food-grade mineral oil; Allow it to penetrate for several hours, then wipe off the excess.
For deeper conditioning, apply beeswax periodically. Monitor the board; if water no longer beads, it’s time to oil. Consistent care prevents drying, cracking, and bacterial buildup, extending its lifespan.
Preventing Warping & Damage
Minimize exposure to extreme temperature and humidity fluctuations. Avoid leaving the board submerged in water or placing it in direct sunlight for extended periods. Consistent oiling is crucial, as it replenishes moisture and reduces wood movement.
Employ a reversible design and rotate the board regularly for even wear. Store it flat, not on its edge, to prevent warping. Address any cracks promptly to prevent further damage and maintain structural integrity.
Safety Precautions When Building
Always wear safety glasses to protect your eyes from flying debris during cutting, planing, and sanding. Utilize a dust mask or respirator to avoid inhaling wood dust, which can be harmful. Ensure proper ventilation in your workspace.
Follow manufacturer’s instructions for all power tools and use push sticks when operating saws. Secure the workpiece firmly with clamps during glue-up and machining. Be mindful of sharp tools and adhesives, handling them with care.
Resources for Further Learning
Explore online woodworking forums and communities for shared knowledge and project inspiration related to end grain boards. Consider subscribing to woodworking magazines and YouTube channels featuring detailed tutorials. Investigate specialized websites offering downloadable plans and instructional videos.
Attend local woodworking classes or workshops to enhance your skills and learn from experienced craftspeople. Utilize online resources detailing wood species characteristics and adhesive properties. Remember continuous learning is key to mastering this craft!