
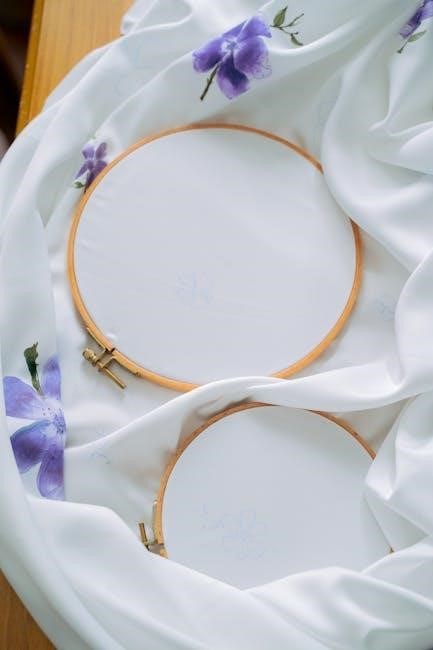
Embroidery, a timeless art, gains accessibility with readily available free printable stitch guides, empowering crafters of all levels to explore this beautiful craft.
These guides democratize learning, offering a cost-effective way to master techniques and enhance sewing projects with unique, hand-embroidered details.
What is Embroidery and Why Use a Guide?
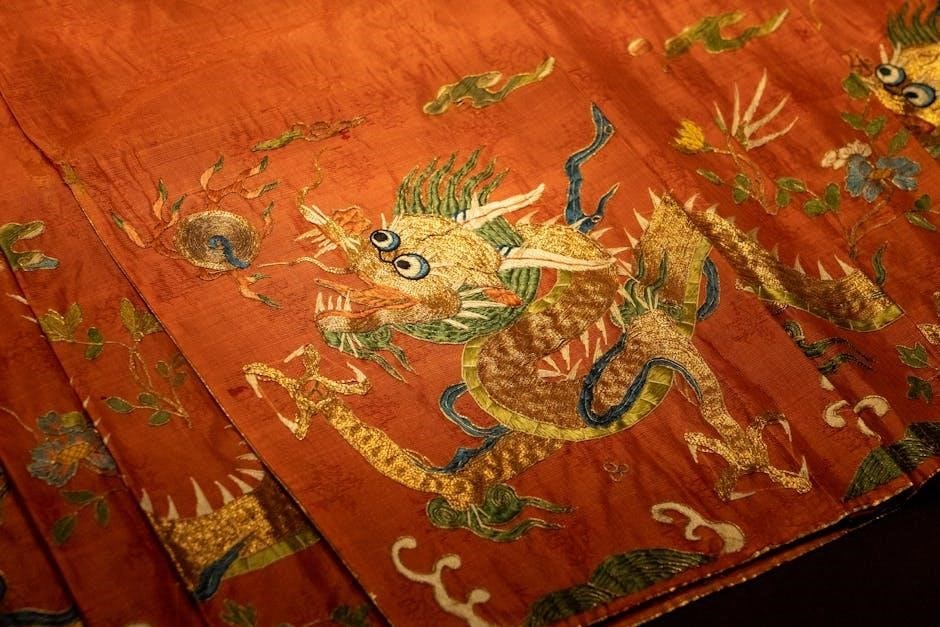
Embroidery is the art of decorating fabric or other materials with needle and thread or yarn. It’s a wonderfully accessible craft, transforming simple textiles into stunning works of art. Historically used for embellishment and storytelling, modern embroidery offers creative expression and personalization.
But where do beginners start? That’s where a free printable embroidery stitch guide becomes invaluable. Learning stitches from scratch can be daunting, but a visual guide breaks down complex techniques into manageable steps. These guides illustrate each stitch with clear diagrams, making it easier to understand and replicate.
A guide ensures consistency, helping you achieve neat and professional-looking results. It’s a fantastic resource for expanding your skillset, moving beyond basic stitches, and tackling more intricate designs. Ultimately, a guide unlocks the potential for beautiful, hand-embroidered projects, fostering creativity and a rewarding crafting experience.
Benefits of Printable Stitch Guides
Printable embroidery stitch guides offer a multitude of advantages for both novice and experienced embroiderers. Firstly, they are cost-effective – eliminating the need to purchase expensive books or classes. Accessing guides online and printing them at home saves significant resources.
Secondly, they provide convenience. Having a visual reference readily available at your workspace streamlines the learning process and allows for quick stitch identification. Furthermore, printable guides are customizable; you can print only the stitches you need for a specific project, creating a tailored resource.
They also promote flexibility, enabling you to learn at your own pace and revisit techniques as needed. Finally, these guides foster accessibility, opening up the world of embroidery to a wider audience, regardless of budget or location, empowering creative exploration.
Essential Embroidery Stitches for Beginners
Embroidery begins with mastering fundamental stitches, providing a solid foundation for intricate designs and unlocking creative potential with simple, accessible techniques.
Running Stitch: The Foundation
The running stitch is arguably the most basic, yet incredibly versatile, stitch in embroidery – truly the cornerstone for beginners and experienced stitchers alike. Often featured prominently in free printable embroidery stitch guides, it’s characterized by simple up-and-down movements of the needle and thread, creating a dashed line effect.
This stitch isn’t just for outlining; it’s frequently used for quick fills, creating textures like grass or hair, and even for gathering fabric. Its simplicity makes it ideal for practicing even thread tension and consistent stitch length. Many guides demonstrate variations, such as even running stitch (uniform spaces) and uneven running stitch (varying spaces) for different aesthetic effects.
Beginners will find the running stitch easy to learn from diagrams in printable guides, allowing them to quickly build confidence and move onto more complex techniques. It’s a fantastic starting point for understanding how thread interacts with fabric and forming the basis for more elaborate designs.
Back Stitch: Creating Outlines
The back stitch is a fundamental technique, frequently highlighted in free printable embroidery stitch guides, renowned for its ability to create solid, defined outlines. Unlike the running stitch, the back stitch produces a continuous line, making it perfect for lettering, detailed floral work, and any design requiring precision.
The process involves bringing the needle up through the fabric, then taking a stitch backward to meet the previous stitch, hence the name. This creates a strong, unbroken line that resembles machine stitching. Printable guides often illustrate how to adjust stitch length for varying line weights and visual impact.
Mastering the back stitch is crucial for achieving clean, professional-looking embroidery; It’s a relatively simple stitch to learn, but requires practice to maintain consistent tension and spacing. It’s a building block for more intricate designs and a staple in many embroidery projects;
Split Stitch: Filling and Detailing
Split stitch, frequently detailed in free printable embroidery stitch guides, is a versatile technique ideal for both filling shapes and adding intricate detailing to embroidery designs. It creates a textured line with a slightly raised appearance, offering a unique aesthetic compared to smoother stitches like satin stitch.
The stitch is formed by bringing the needle up through the fabric and then down through the center of the previous stitch. This “splits” the thread, creating a textured effect. Printable guides often demonstrate varying stitch angles to achieve different visual textures and densities.
Split stitch excels at filling small areas or creating delicate shading. It’s also excellent for outlining shapes where a bolder line isn’t desired. Practice controlling thread tension to achieve a consistent and visually appealing split effect, enhancing your embroidery projects.
Satin Stitch: Smooth, Solid Areas
Satin stitch, a cornerstone technique showcased in many free printable embroidery stitch guides, is renowned for creating smooth, solid areas of color in embroidery. It’s perfect for filling petals of flowers, leaves, or any shape requiring a polished, seamless finish. The stitch involves bringing the needle up on one side of the shape and down on the other, creating closely packed stitches that lie flat against the fabric.
Printable guides emphasize maintaining consistent stitch length and tension for a professional look. Short stitches are recommended for curves, while longer stitches suit straight edges. Careful thread control prevents puckering or gaps.
Mastering satin stitch elevates embroidery projects, adding depth and realism. It’s a foundational skill for achieving high-quality, visually striking results, readily learned with detailed guide assistance.
Intermediate Embroidery Stitches
Free printable embroidery stitch guides unlock more complex techniques, building upon basics to introduce textured stitches and decorative elements for skilled crafters.
French Knot: Adding Texture
French knots, though seemingly intricate, become achievable with clear free printable embroidery stitch guides; these guides break down the process into manageable steps for beginners.
These tiny, knotted stitches excel at adding delightful texture and dimension to embroidery projects, mimicking flower centers, animal fur, or simply creating a dotted effect.
Guides typically illustrate how to bring the needle up, wrap the thread around it a specific number of times (usually one to three), and then re-insert the needle close to the original entry point, holding the thread taut.
Mastering tension is key – too loose, and the knot unravels; too tight, and it distorts the fabric. Printable guides often include diagrams demonstrating correct tension and common mistakes to avoid, ensuring successful knot formation.
Experimenting with different thread weights and knot densities allows for varied textural effects, enhancing the overall visual appeal of your embroidered designs.
Chain Stitch: Bold Lines and Fills
Chain stitch, a versatile technique, is beautifully demystified through free printable embroidery stitch guides, offering clear visual instructions for both outlining and filling areas.
This stitch creates a chain-like appearance, making it ideal for bold lines, decorative borders, and even filling larger shapes with a textured, rope-like effect. Guides typically illustrate the looping motion – bringing the needle up, inserting it back into the previous loop, and repeating.
Maintaining consistent loop size is crucial for a neat appearance; guides often provide tips on thread tension and stitch placement to achieve uniformity.
Variations like twisted chain stitch add further visual interest. Printable guides frequently showcase these variations, expanding your creative possibilities.
The stitch’s inherent strength makes it suitable for outlining designs that require definition and durability, enhancing the longevity of your embroidered artwork.
Lazy Daisy Stitch: Floral Designs
Lazy Daisy stitch, a charming and foundational element in floral embroidery, is easily learned with the aid of free printable embroidery stitch guides, providing step-by-step visuals.
This detached chain stitch forms individual petals, making it perfect for creating delicate flowers, leaves, and whimsical designs. Guides typically demonstrate how to create the loop and secure it with a small tacking stitch.
Varying the loop size and spacing allows for diverse floral arrangements, from simple daisies to more complex blossoms. Printable guides often showcase different petal configurations.
Combining Lazy Daisy stitches with French knots for flower centers adds depth and realism. Guides may include examples of these combinations.
Mastering this stitch unlocks a world of floral creativity, allowing you to embellish fabrics with beautiful, hand-embroidered botanical motifs.
Feather Stitch: Decorative Borders
Feather Stitch is a versatile technique ideal for creating elegant and decorative borders, beautifully illustrated within free printable embroidery stitch guides for easy learning.
This stitch resembles a row of feathers, formed by a series of small, angled stitches worked along a line. Guides clearly demonstrate the stitch direction and spacing for consistent results.
It’s perfect for edging linens, embellishing clothing, or framing embroidered panels, adding a refined touch to any project. Printable guides often show variations in stitch height and angle.
Experimenting with different thread colors and weights can dramatically alter the border’s appearance, from subtle accents to bold statements.
Guides frequently include tips on maintaining even tension and creating neat, professional-looking borders, enhancing your embroidery skills.

Advanced Embroidery Stitches
Free printable embroidery stitch guides unlock complex techniques like herringbone, woven, couching, and seed stitches, elevating your artistry and project sophistication.
Herringbone Stitch: Textured Patterns
Herringbone stitch, beautifully showcased in free printable embroidery stitch guides, creates a distinctive, textured pattern resembling the skeleton of a herring – hence the name! This versatile stitch is fantastic for filling shapes, outlining designs, or even creating standalone decorative elements.
Guides typically illustrate how to form the ‘V’ shapes that interlock, building the characteristic zigzag effect. Mastering the tension is key; consistent stitches ensure a neat, even texture. Beginners often find it helpful to practice on scrap fabric first, following the diagram closely.
Beyond its visual appeal, herringbone stitch adds subtle dimension to embroidery. It’s particularly effective when using contrasting thread colors to highlight the pattern. Many free guides offer variations, such as double herringbone, for increased density and visual impact. Explore these options to personalize your projects!
Woven Stitch: Creating Dimensionality
Woven stitch, clearly demonstrated in free printable embroidery stitch guides, is a fantastic technique for adding significant texture and dimensionality to your embroidery work. Unlike flat stitches, woven stitch builds up the surface, creating a raised, almost sculptural effect. This makes it ideal for focal points or areas where you want to draw the eye.
Guides will typically show a series of parallel stitches laid across a base layer, then a perpendicular set woven over and under them. Maintaining consistent spacing and tension is crucial for a neat, even weave. Practice on scrap fabric is highly recommended!
Experiment with different thread weights and colors to enhance the dimensional effect. Woven stitch is particularly effective for creating realistic textures, like fur or foliage. Many free guides offer variations, allowing you to customize the stitch’s appearance and create unique designs.
Couching Stitch: Adding Thick Threads
Couching stitch, beautifully illustrated in free printable embroidery stitch guides, allows you to work with threads too heavy or bulky for standard embroidery needles. This technique involves laying the thick thread on the fabric surface and securing it with small, evenly spaced stitches – the ‘couching’ stitches – using a finer thread.
Guides will demonstrate how to create both straight and curved lines with couching. The key is maintaining consistent spacing between the couching stitches to prevent puckering or distortion of the laid thread. Experiment with different thread combinations; metallic threads, wool, or even ribbon can be couched.
Couching is excellent for outlining shapes, creating bold decorative lines, or adding textural elements. Detailed guides often show variations like twisted couching, adding further visual interest. It’s a versatile stitch for both beginners and experienced embroiderers.
Seed Stitch: Delicate Texture
Seed stitch, clearly depicted in free printable embroidery stitch guides, creates a wonderfully textured surface resembling scattered seeds. This stitch involves making small, individual stitches close together, but not necessarily in a uniform pattern, giving a delightfully organic feel. Guides will illustrate varying stitch densities to achieve different textural effects.

It’s a fantastic technique for filling small areas, adding subtle shading, or representing foliage, fur, or even stippling effects. The guides often show how to control the direction and spacing of the stitches to create specific visual outcomes. Mastering seed stitch requires practice in maintaining consistent stitch length.
Experiment with different thread colors and weights to enhance the textural depth. Seed stitch is a versatile addition to any embroidery project, offering a delicate yet impactful detail.
Finding and Using Free Printable Guides
Free printable embroidery stitch guides are abundant online, offering accessible learning resources for beginners and experienced stitchers alike, readily available now!
Popular Websites Offering Free Guides
Numerous websites generously provide free printable embroidery stitch guides, catering to diverse skill levels and project preferences. DMC, a renowned thread manufacturer, offers comprehensive stitch guides alongside project ideas, making it an excellent starting point for beginners.
The Spruce Crafts features a curated collection of stitch tutorials with clear diagrams and instructions, covering everything from basic to more advanced techniques. Needle ‘n Thread, created by Mary Corbet, is a treasure trove of embroidery resources, including detailed stitch guides, tutorials, and tips for perfecting your craft.
LoveCrafts also provides a selection of free patterns and stitch guides, often accompanied by video tutorials. Don’t overlook Pinterest; a vast repository of links to various blogs and websites offering downloadable guides. Exploring these platforms unlocks a world of embroidery inspiration and learning opportunities, all accessible at no cost!
Understanding Stitch Diagrams
Embroidery stitch diagrams are visual representations crucial for interpreting free printable guides. Typically, a line indicates the path of the needle, while arrows show the direction of each stitch. Different colors often differentiate between thread colors or stitch layers, enhancing clarity.
Pay close attention to the stitch length and spacing indicated on the diagram; these details significantly impact the final appearance. Numbers frequently denote the stitch count or sequence, guiding you through complex patterns. Understanding the symbols representing thread entry and exit points is also vital for accurate execution.
Many guides include a key explaining all symbols used. Practice deciphering diagrams with simple stitches before tackling intricate designs. Mastering this skill unlocks the full potential of free resources, enabling confident and successful embroidery projects!

Printing and Preparing Your Guide
Printing your free printable embroidery stitch guide requires careful attention to detail. Ensure your printer settings are adjusted for the best quality – a higher DPI (dots per inch) yields sharper lines and clearer diagrams. Select “actual size” or disable “fit to page” to maintain accurate stitch measurements.
Consider printing on heavier paper or cardstock for durability, especially for frequently referenced guides. Once printed, protect the guide with clear laminating sheets to prevent wear and tear from handling or accidental spills.
Before starting, familiarize yourself with the layout and key. Having a well-prepared, easily readable guide streamlines the embroidery process, minimizing frustration and maximizing enjoyment. A little preparation goes a long way!
Customizing Your Embroidery Projects
Embroidery truly shines when personalized! Combine free printable stitch guides with unique fabrics, threads, and patterns to create truly bespoke, artistic expressions.
Choosing Fabrics and Threads
Selecting the right materials is crucial for successful embroidery, complementing your free printable stitch guide’s designs. For beginners, tightly woven cotton like quilting cotton or linen provides a stable base, preventing puckering. Consider the fabric weight; lighter fabrics are easier to stitch, while heavier ones offer durability.
Thread choice dramatically impacts the final look. Embroidery floss, typically made of six strands, allows for varying thickness by separating the strands. Cotton floss is versatile and affordable, while silk floss offers a luxurious sheen. Rayon provides vibrant colors, but is less durable. Experiment with different thread weights and materials to achieve desired textures and effects, enhancing the stitches learned from your guide. Don’t be afraid to mix and match!
Transferring Patterns to Fabric
Accurately transferring your chosen design from a free printable stitch guide onto fabric is a foundational step. Several methods exist, each with pros and cons. Tracing with a water-soluble pen is popular for light-colored fabrics, disappearing after stitching. Iron-on transfer pencils work well on cotton, but require careful application to avoid smudging.
For darker fabrics, consider using tracing paper and a light source, or employing a sticky stabilizer. Stabilizers temporarily adhere to the fabric, providing a firm surface for tracing and stitching. Remember to test your chosen method on a scrap piece of fabric first! Precise pattern transfer ensures accurate stitch placement, maximizing the impact of your embroidery project guided by the chosen stitch guide.
Troubleshooting Common Embroidery Issues
Even with a free printable stitch guide, challenges can arise. Puckered fabric often indicates overly tight tension; loosen it slightly. Broken threads frequently stem from dull needles – replace them regularly! Uneven stitches might signal inconsistent thread length or improper fabric hooping. Ensure your fabric is taut but not stretched.
If your design appears distorted, double-check your pattern transfer accuracy. Knots on the back of your work can be minimized by using shorter thread lengths and a thimble. Don’t be discouraged! Embroidery is a learning process. Refer back to your stitch guide for technique reminders, and practice makes perfect.

Resources and Further Learning
Online communities and recommended books expand embroidery skills beyond free printable guides, fostering creativity and providing advanced techniques for enthusiasts.
Online Embroidery Communities
Embroidery flourishes within vibrant online communities, offering invaluable support and inspiration for stitchers utilizing free printable stitch guides. Platforms like Reddit’s r/Embroidery and numerous Facebook groups provide spaces to share projects, ask questions, and receive constructive feedback from fellow enthusiasts.
These digital hubs are excellent resources for troubleshooting tricky stitches, discovering new patterns, and learning about different embroidery styles. Many communities host regular stitch-alongs, guided projects that encourage participation and skill development, often complementing the use of printable guides. Instagram, with hashtags like #embroidery and #handembroidery, serves as a visual feast of creativity, showcasing diverse techniques and inspiring new project ideas. Engaging with these communities fosters a sense of belonging and accelerates learning, transforming a solitary craft into a collaborative and enriching experience.
Recommended Books and Courses
While free printable stitch guides offer a fantastic starting point, supplementing your learning with dedicated resources can significantly enhance your embroidery skills. Books like “The Embroidery Stitch Bible” by Clare Sharples provide comprehensive stitch directories and detailed instructions, building upon the foundation established by printable guides.
Online courses, available on platforms like Skillshare and Creativebug, offer structured learning paths with video tutorials and project-based assignments. These courses often delve into advanced techniques and design principles, expanding beyond basic stitch execution. Consider exploring books focused on specific embroidery styles, such as crewel embroidery or blackwork, to deepen your expertise. Combining the accessibility of free guides with the in-depth knowledge found in books and courses creates a well-rounded learning experience, fostering creativity and technical proficiency.