

Drip irrigation systems offer a focused watering approach, detailed in guides like the 2022 Hydro-Rain Drip Irrigation Installation Guide.
These guides, available as PDF downloads from sources like Irrigation Liquids, provide comprehensive overviews for system design and implementation.
Hunter Industries highlights the importance of check valves within inline drip products, ensuring water doesn’t flow backwards, as detailed in their resources.
Irrigationdirect.com suggests initial watering cycles to assess moisture levels, a key step outlined in many drip irrigation installation resources.
What is Drip Irrigation?
Drip irrigation is a highly efficient watering method delivering water directly to plant roots, minimizing waste through evaporation and runoff. Numerous drip irrigation installation guide PDFs, such as those from Hydro-Rain (published June 2, 2022), detail this process.
Unlike traditional methods, drip systems utilize a network of tubes, emitters, and connectors to slowly release water. Guides emphasize the importance of proper component selection, including backflow preventers and pressure regulators, to ensure optimal performance.
Resources from Irrigationdirect.com suggest starting with 2-3 irrigation cycles to monitor moisture levels, a crucial aspect of understanding how a drip system functions. Hunter Industries’ documentation highlights the inclusion of built-in check valves in their inline drip products, preventing backflow and maintaining water pressure. These guides collectively illustrate that drip irrigation is a precisely engineered system for targeted hydration.
Benefits of Drip Irrigation Systems
Drip irrigation systems offer substantial advantages, as detailed in various drip irrigation installation guide PDFs. Primarily, they conserve water by delivering it directly to root zones, minimizing evaporation – a key benefit highlighted across resources.
Guides from Irrigationdirect.com emphasize the ability to adjust watering schedules based on plant needs and seasonal changes, maximizing efficiency. Hunter Industries’ documentation points to the reliability of check valves, preventing water loss due to elevation differences.
Furthermore, drip irrigation reduces weed growth by keeping surface soil drier, and minimizes foliage diseases by avoiding wetting leaves. The Hydro-Rain guide (2022) showcases how proper installation, as outlined in the PDF, leads to healthier plants and reduced water bills. Ultimately, these systems promote sustainable gardening practices.
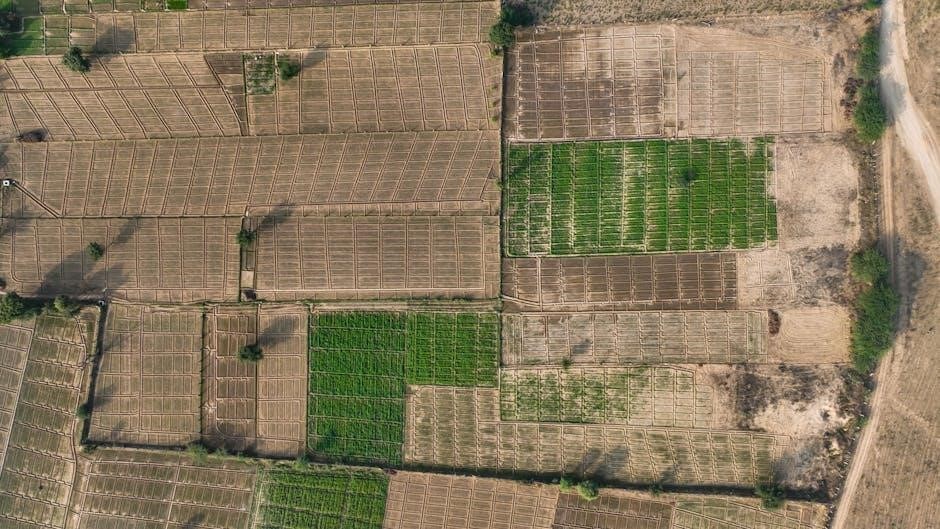
Drip Irrigation vs. Traditional Watering Methods
Traditional watering methods, like sprinklers, often result in significant water waste through evaporation and runoff, a contrast highlighted in drip irrigation installation guide PDFs. Drip systems, conversely, deliver water directly to plant roots, drastically reducing these losses.
Resources from Irrigationdirect.com suggest monitoring soil moisture with drip systems allows for precise watering, unlike the often-generalized approach of sprinklers. Guides emphasize that drip irrigation minimizes foliage wetness, decreasing the risk of fungal diseases – a common issue with overhead watering.
The Hydro-Rain PDF (2022) details how drip systems can be customized for individual plant needs, something difficult to achieve with traditional methods. Hunter Industries’ documentation underscores the efficiency gains, particularly in areas with elevation changes, where drip systems maintain consistent pressure.
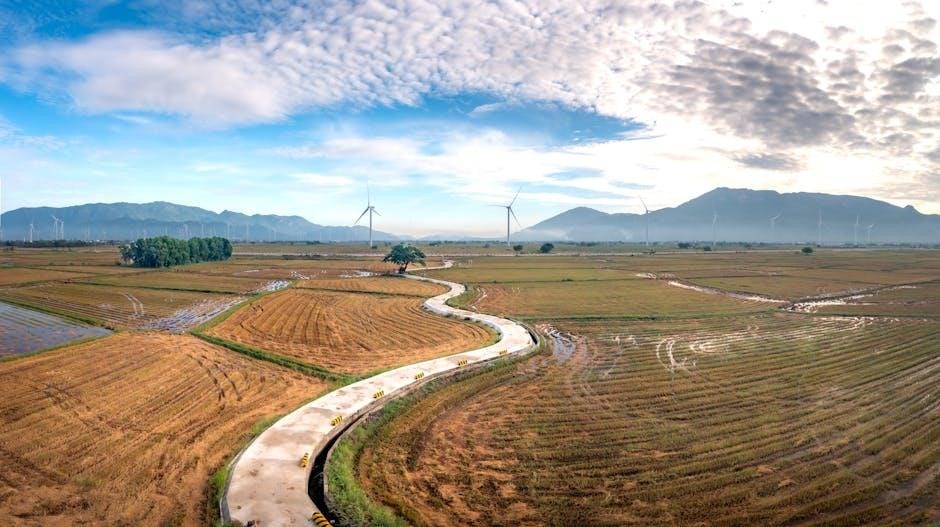
Planning Your Drip Irrigation System
Planning involves assessing water sources, mapping gardens, and calculating plant needs, as detailed in drip irrigation installation guide PDFs.
Careful design, per guides, ensures future expansions are possible.
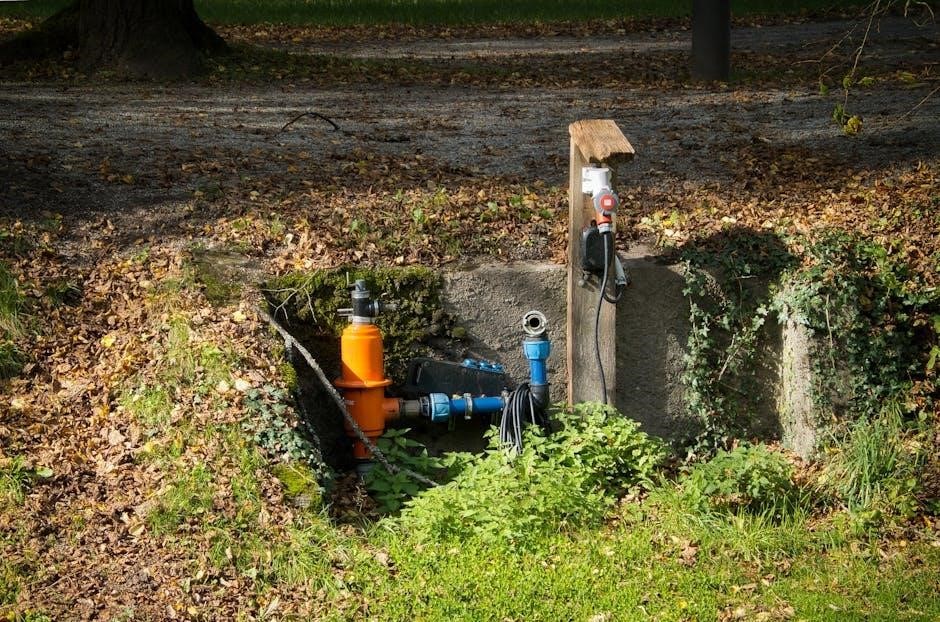
Assessing Your Water Source and Pressure
Evaluating your water source is a crucial first step, thoroughly covered in drip irrigation installation guide PDFs. These guides emphasize determining both the availability and pressure of your water supply.
Insufficient pressure can severely limit system effectiveness, necessitating pressure regulators – a component frequently discussed in installation manuals. Hunter Industries’ resources specifically mention considering elevation differences; for every 4.5 feet of elevation change, separate zones or additional check valves are recommended to maintain adequate pressure.

Guides also advise consulting local codes for proper installation methods and approvals related to backflow prevention, ensuring compliance and safe operation. Understanding your water source’s capabilities directly impacts component selection and overall system design, as highlighted in resources from Irrigation Liquids and Irrigationdirect.com.
Mapping Your Garden or Landscape
Creating a detailed map of your garden is a foundational step, consistently emphasized in drip irrigation installation guide PDFs. This map should accurately depict plant locations, types, and their specific water requirements – a key element for efficient zone planning.
Irrigationdirect.com’s quick tip stresses leaving sufficient flow capacity for future system expansions during the mapping phase. This proactive approach prevents limitations as your garden evolves. The map facilitates calculating the necessary emitter placement and tubing runs for optimal coverage.
Calculating Water Requirements for Different Plants
Determining individual plant water needs is crucial for a successful drip irrigation system, a point thoroughly covered in drip irrigation installation guide PDFs. Plants vary significantly in their consumption; grouping plants with similar requirements into ‘zones’ optimizes water use.
Resources from Irrigation Liquids highlight that a comprehensive design guide will detail this process. Consider factors like plant type, sun exposure, and soil composition when calculating needs. Irrigationdirect.com advises gradual schedule adjustments based on observed moisture levels and plant health.
Guides emphasize that proper emitter selection – varying flow rates – is directly linked to accurate water requirement calculations. Hunter Industries’ resources underscore the importance of matching emitter output to plant needs for efficient and healthy growth.
Components of a Drip Irrigation System
Drip irrigation installation guide PDFs detail essential parts: backflow preventers, filters, pressure regulators, mainline tubing, drip tubing, emitters, and necessary fittings;
Hunter Industries emphasizes check valves within components, while guides cover selecting appropriate flow rates.
Backflow Preventer & Filter
Backflow preventers and filters are critical first steps in any drip irrigation system, as detailed in numerous drip irrigation installation guide PDFs. These components safeguard your water supply, preventing contaminants from re-entering the potable water source.
Guides emphasize the importance of selecting a backflow preventer that meets local plumbing codes and regulations. Atmospheric vacuum breakers, pressure vacuum breakers, or anti-siphon valves are commonly recommended, positioned at least 12 inches above the highest emitter, according to Hunter Industries resources.
Filters are equally vital, removing debris like sand, silt, and algae that can clog emitters. Installation guides often specify mesh size based on water source quality. Regular filter cleaning, as highlighted in maintenance sections of these guides, is essential for optimal system performance and longevity. Proper installation ensures clean water reaches your plants.
Pressure Regulator
A pressure regulator is a non-negotiable component in drip irrigation systems, consistently emphasized within drip irrigation installation guide PDFs. Municipal water pressure is often too high for the delicate emitters used in drip irrigation, leading to bursts and uneven watering.
These regulators reduce incoming water pressure to the optimal range, typically between 25-30 PSI, ensuring consistent and efficient water delivery. Guides detail how to select a regulator based on your water source pressure and system size.
Proper placement, immediately after the backflow preventer and filter, is crucial. Installation guides often illustrate this setup. Maintaining consistent pressure prevents damage to tubing and emitters, maximizing system lifespan and plant health. Ignoring this step can lead to costly repairs and inconsistent watering.
Mainline Tubing (PVC or Polyethylene)
Mainline tubing, typically constructed from either PVC or polyethylene, forms the backbone of your drip irrigation system, as detailed in numerous drip irrigation installation guide PDFs. Polyethylene is more flexible and easier to install, making it ideal for DIY projects and curved landscapes.
PVC, while requiring more specialized tools for cutting and connecting, offers greater durability and resistance to UV degradation. Guides emphasize selecting the correct diameter tubing based on the system’s length and water flow requirements.
Proper burial or UV protection is vital to prevent cracking and ensure longevity. Installation guides illustrate connection methods using fittings and connectors, ensuring a watertight seal. Careful planning of the mainline layout is essential for efficient water distribution throughout the garden.
Drip Tubing (1/2″ or 1/4″)
Drip tubing, commonly available in 1/2″ and 1/4″ sizes, extends from the mainline to deliver water directly to plant roots, as explained in comprehensive drip irrigation installation guide PDFs. The 1/2″ tubing serves as a secondary distribution line, branching off the mainline to cover larger areas.
The smaller 1/4″ tubing, often called spaghetti tubing, connects directly to emitters and is used for individual plants or closely spaced rows. Guides detail how to connect these sizes using barbed fittings, ensuring secure and leak-proof joints.
Choosing the appropriate size depends on the distance from the mainline and the number of emitters needed. Proper layout and securing of the tubing are crucial for efficient water delivery and to prevent damage, as highlighted in installation resources.
Emitters (Different Types & Flow Rates)
Emitters are the heart of a drip system, releasing water slowly and directly to plant roots. Drip irrigation installation guide PDFs detail various types, including pressure-compensating, adjustable, and inline emitters.
Pressure-compensating emitters maintain a consistent flow rate despite pressure fluctuations, crucial for even watering across sloped landscapes. Adjustable emitters allow customization of water output per plant, catering to individual needs.
Flow rates, measured in gallons per hour (GPH), determine the amount of water delivered. Guides emphasize selecting the correct GPH based on plant type, soil conditions, and root zone size. Hunter Industries resources note the importance of elevation considerations when choosing emitter types.
Proper emitter placement and spacing are vital for optimal performance.
Fittings & Connectors
Fittings and connectors are essential for assembling a functional drip irrigation system, as detailed in comprehensive drip irrigation installation guide PDFs. These components join tubing sections, create branches, and connect emitters to the mainline.
Common fittings include elbows, tees, couplings, and end caps. Barbed fittings create secure connections without glue, simplifying installation and repairs. Compression fittings offer a more robust, watertight seal for critical junctions.
Guides emphasize selecting fittings compatible with the tubing size (1/2″ or 1/4″). Irrigationdirect.com suggests planning for future expansions when choosing fittings, ensuring sufficient flow capacity. Proper sealing is crucial to prevent leaks, and Teflon tape is often recommended.
A well-planned fitting arrangement minimizes water waste and maximizes system efficiency.

Installation Process: Step-by-Step Guide
Installation guides, like those from Hydro-Rain, detail laying mainline tubing, connecting drip lines, installing emitters, and securing components for efficient watering.
Laying Out the Mainline Tubing
Mainline tubing, typically PVC or polyethylene, forms the backbone of your drip irrigation system. Installation guides, such as the PDF from Irrigation Liquids, emphasize careful planning before laying this crucial component.
Begin by mapping your garden, referencing your plan to determine the most efficient route for the mainline. Consider future expansions, as Irrigationdirect.com advises leaving sufficient flow capacity.
Ensure the tubing is supported and protected from damage, especially where it crosses walkways or driveways. Hunter Industries’ resources highlight the need to account for elevation differences, potentially requiring separate zones or additional check valves every 4.5 feet of rise.
Proper layout minimizes pressure loss and ensures even water distribution throughout the system, as detailed in comprehensive drip irrigation installation guides.
Connecting Drip Tubing to the Mainline
Connecting drip tubing to the mainline requires appropriate fittings and connectors, detailed in resources like the Hydro-Rain Drip Irrigation Installation Guide PDF. These connections are critical for a leak-free and efficient system.
Typically, saddle clamps or punch connectors are used to tap into the mainline, allowing for the insertion of smaller diameter drip tubing. Ensure a tight seal to prevent water loss, a point emphasized in various installation guides.
Flow control valves, as suggested by Irrigationdirect.com, can be installed on both 1/2″ and 1/4″ drip tubing at this stage, enabling isolation and control of water to specific zones.
Hunter Industries’ documentation doesn’t directly address this connection, but their focus on check valves highlights the importance of preventing backflow at all connection points within the system.
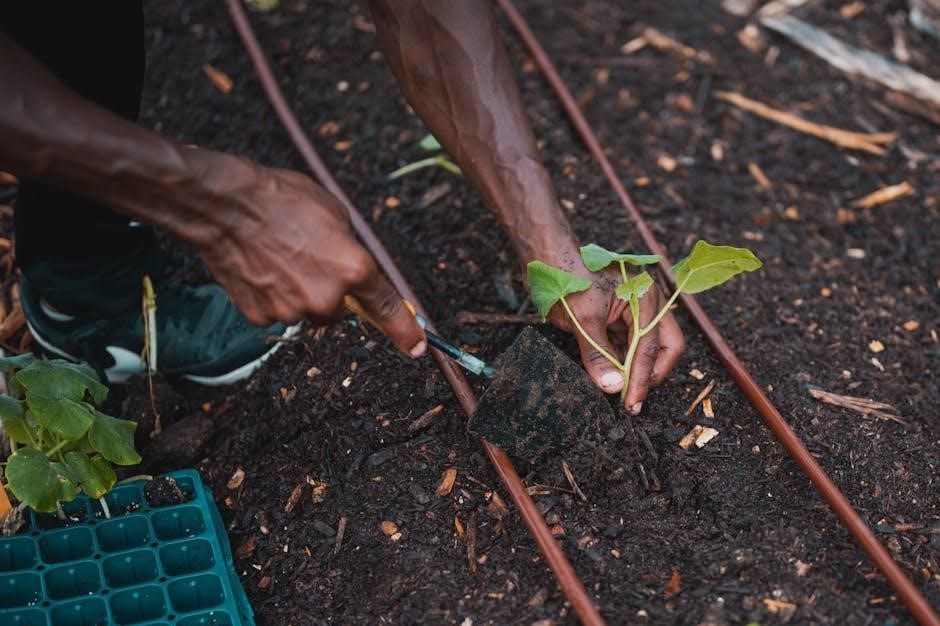
Installing Emitters
Installing emitters is a crucial step, detailed within drip irrigation installation guide PDFs like those from Hydro-Rain. Emitters regulate water flow directly to plant roots, maximizing efficiency.
Different emitter types and flow rates exist, catering to varying plant needs. Irrigationdirect.com advises checking moisture around emitters and root zones after initial cycles, ensuring adequate hydration.
Emitters can be inserted directly into drip tubing or connected via micro tubing, depending on plant spacing and requirements. Proper spacing is vital for even water distribution.
While Hunter Industries focuses on check valves within inline systems, their principles of preventing backflow apply to emitter installation as well, ensuring consistent performance. Gradual adjustments to emitter placement and flow rates are recommended for optimal results.
Securing Tubing and Emitters
Securing tubing and emitters is essential for a reliable drip irrigation system, thoroughly covered in drip irrigation installation guide PDFs. Proper anchoring prevents movement and damage, ensuring consistent water delivery;
Use stakes or ground staples to hold drip tubing in place, especially on slopes or uneven terrain; These are readily available at irrigation supply stores.
Emitters should be firmly seated in the tubing or micro-tubing connections to prevent leaks or dislodgement. Check for secure connections after installation and periodically throughout the season.
Guides emphasize planning for future expansions, so avoid overly tight securing that might hinder modifications. Hunter Industries’ resources highlight elevation considerations, indirectly relating to secure placement to maintain consistent pressure.
Regular inspection, as suggested by Irrigationdirect.com’s advice on monitoring moisture, also allows for identifying and addressing any loosening of components.
System Testing and Adjustment
System testing, detailed in drip irrigation installation guide PDFs, involves flushing, leak checks, and emitter flow adjustments for optimal performance.
Irrigationdirect.com advises checking moisture and plant health during initial cycles.
Initial System Flush
Following installation, a crucial step, thoroughly documented in various drip irrigation installation guide PDFs, is the initial system flush. This process effectively removes any debris, sediment, or manufacturing remnants that may have accumulated within the mainline tubing and drip lines during installation.
Proper flushing ensures that emitters aren’t immediately clogged, guaranteeing consistent water delivery to plants. Guides emphasize running the system for several minutes, allowing water to forcefully push out any obstructions.
Inspect emitters during the flush to confirm clear water flow. This initial purge safeguards the longevity and efficiency of the entire drip irrigation system, preventing future maintenance issues and maximizing water conservation, as highlighted in resources from Irrigation Liquids and Hydro-Rain.
Regular flushing, even after the initial setup, is also recommended.
Checking for Leaks
Post-installation, a meticulous leak check is paramount, extensively covered in drip irrigation installation guide PDFs. This involves a systematic inspection of all connections – at the backflow preventer, pressure regulator, mainline joints, emitter connections, and any fittings.
Carefully examine each component while the system is running at normal pressure. Look for visible water spray, dripping, or pooling around connections. Guides emphasize tightening fittings as needed, but avoid over-tightening, which can damage components.
Pay close attention to areas where tubing changes direction or connects to emitters. Resources from Hunter Industries and Irrigationdirect.com stress the importance of identifying and addressing leaks promptly to prevent water waste and maintain optimal system performance. Addressing leaks ensures efficient water delivery.
Adjusting Emitter Flow Rates
Drip irrigation installation guide PDFs consistently highlight the necessity of adjusting emitter flow rates to match individual plant needs. Different plants require varying amounts of water, and emitters come in diverse flow rate options – typically measured in gallons per hour (GPH).
Initial adjustments should be based on plant type, size, and local climate. Irrigationdirect.com advises making gradual changes to the watering schedule, observing plant health and soil moisture levels. Flow control valves, recommended for both 1/2″ and 1/4″ tubing, allow for isolated control and fine-tuning.
Regular monitoring and adjustments are crucial, especially as seasons change. Guides emphasize that optimizing flow rates maximizes water efficiency and promotes healthy plant growth. Proper adjustment prevents over or under-watering, leading to thriving landscapes.
Monitoring Soil Moisture
Drip irrigation installation guide PDFs universally stress the importance of consistent soil moisture monitoring for optimal system performance. Relying solely on timers isn’t sufficient; actual soil conditions dictate watering needs.
Irrigationdirect.com emphasizes checking for moisture around drip emitters and root zones during initial cycles, ensuring the soil isn’t excessively wet or dry. Regularly assess soil moisture by hand – the “finger test” is a simple, effective method.
Adjusting schedules based on these observations is key to preventing water waste and promoting healthy plant growth. Factors like weather, plant type, and soil composition influence moisture levels. Proactive monitoring allows for timely adjustments, ensuring plants receive adequate hydration throughout the growing season.
Maintaining Your Drip Irrigation System
Drip irrigation installation guide PDFs detail routine maintenance like filter cleaning and emitter checks. Regular upkeep ensures efficient water delivery and prolongs system lifespan.
Resources highlight winterization procedures to prevent freeze damage.
Filter Cleaning
Filter cleaning is a crucial aspect of drip irrigation system maintenance, extensively covered in drip irrigation installation guide PDFs. These guides emphasize that filters prevent clogging of emitters, ensuring consistent water flow and optimal plant hydration.
Debris, such as sediment and organic matter, accumulates within the filter over time, reducing water pressure and potentially damaging emitters. Regular inspection – ideally monthly, or more frequently with turbid water sources – is recommended.
The installation guides typically detail a simple cleaning process: disassemble the filter housing, rinse the filter element with clean water, and remove any stubborn debris. Some filters are designed for backflushing, offering a convenient cleaning method. Proper filter maintenance, as outlined in these guides, significantly extends the lifespan and efficiency of your drip irrigation system.
Emitter Cleaning or Replacement
Drip irrigation installation guide PDFs consistently highlight the importance of maintaining clean and functional emitters. Emitters, responsible for delivering water directly to plant roots, are prone to clogging from mineral deposits or organic matter.
Guides recommend periodically inspecting emitters for consistent flow. If an emitter is blocked, initial attempts should involve gently flushing it with water or using a small pin to dislodge debris. However, persistent clogging often necessitates emitter replacement.

Many installation guides detail how to easily remove and replace emitters, often requiring only simple hand tools. Choosing high-quality emitters and implementing a regular filter cleaning schedule, as detailed in these resources, minimizes the need for frequent replacement and ensures optimal system performance.
Winterization Procedures
Drip irrigation installation guide PDFs universally emphasize thorough winterization to prevent damage from freezing temperatures. Water left within the system can expand when frozen, causing cracks and breaks in tubing and emitters.
The core procedure involves completely draining the system. Guides detail disconnecting the water source and opening all valves to allow water to escape. Utilizing compressed air to blow out remaining water in the lines is also commonly recommended.
Some installation guides suggest insulating exposed pipes or burying them below the frost line for added protection. Storing components indoors during winter is also advised. Proper winterization, as outlined in these resources, ensures a quick and easy start-up when warmer weather returns, extending the lifespan of your drip irrigation system.